
Basket of flowers. Crochet. Basket with flowers Children's crafts for March 8th with a bow
Crocheted flowers in a pot. Flowers Lily.
Leaves and pot acrylic yarn, flowers thin wool blend yarn, hook No. 1, 75, finished product weight 290 g. (yarn -260 g), wire 90 cm, padding polyester, beads.
Leaves— 9 pcs., flowers — 5 pcs.
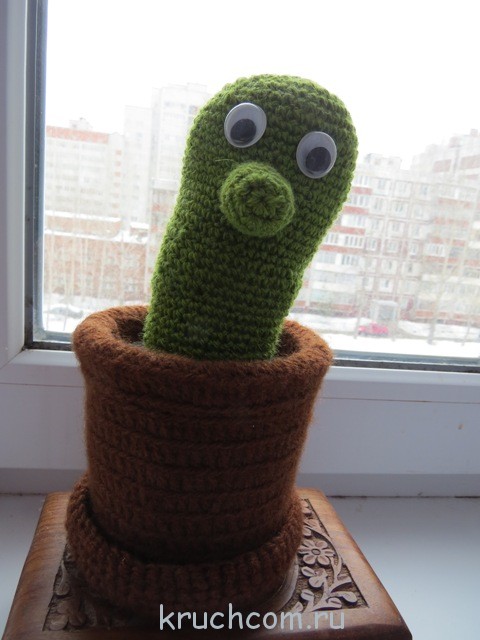
Competition work No. 29 – Knitted cactus
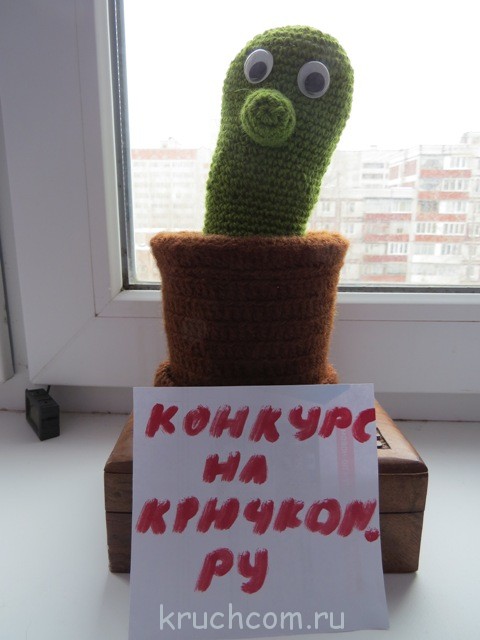
I knitted the cactus without any descriptions or diagrams. The pot is double crochet, and the cactus itself is single crochet.
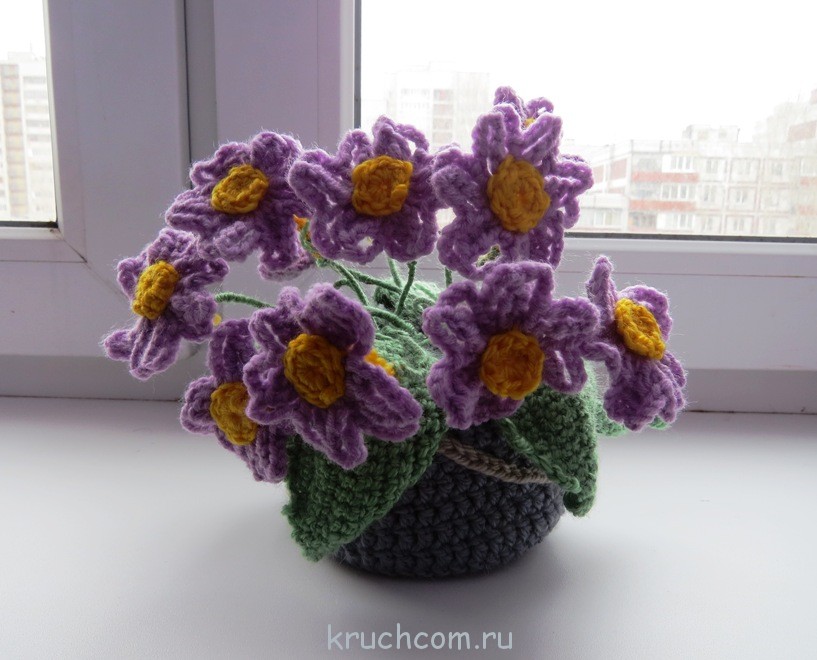
Competition work No. 28 – Knitted violets
Good afternoon. Many colors have already been presented at the competition. But since I decided to knit flowers in a pot from the very beginning of the competition, I present to your attention my two works)). Violets are a gift for mom on March 8, and a cheerful cactus is a gift for grandma.

I knitted violets from half-wool according to the description.

Only the leaves didn’t turn out as described, so I knitted them myself as best I could.

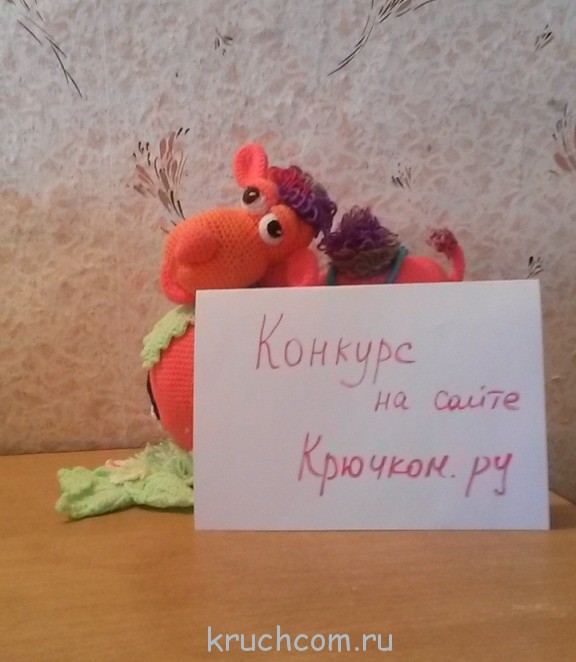
Competition entry No. 26 – Baby Camel and Strawberry House
My name is Yulia, I’m 24 years old. I really like to crochet.
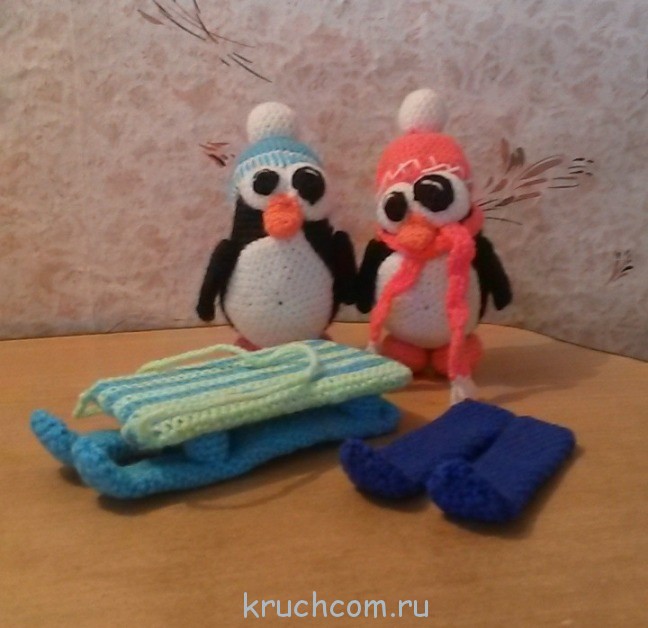
Competition work No. 25 – Knitted penguins
Hello! I want to take part in your new competition. I’m taking part for the fourth time, I haven’t won anything yet, but I hope.
My name is Yulia, I am 24 years old. I really like to crochet.
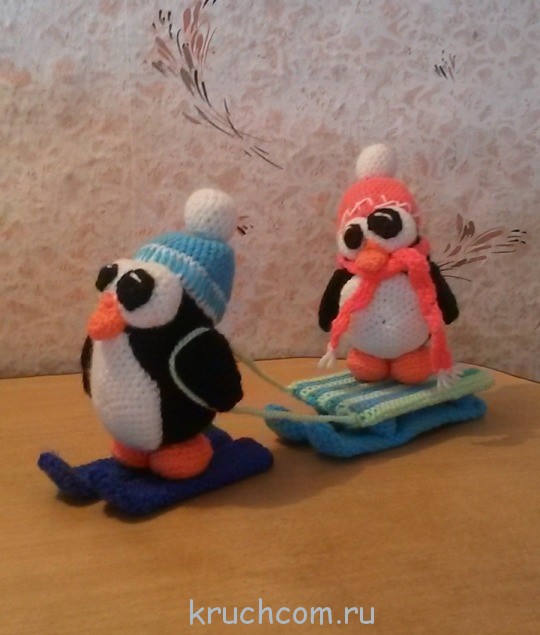
I knitted penguins for a friend’s daughter, the description is paid, so I don’t have the right to post it.


Competition entry No. 23 – Knitted pillowcase
Pillowcase.
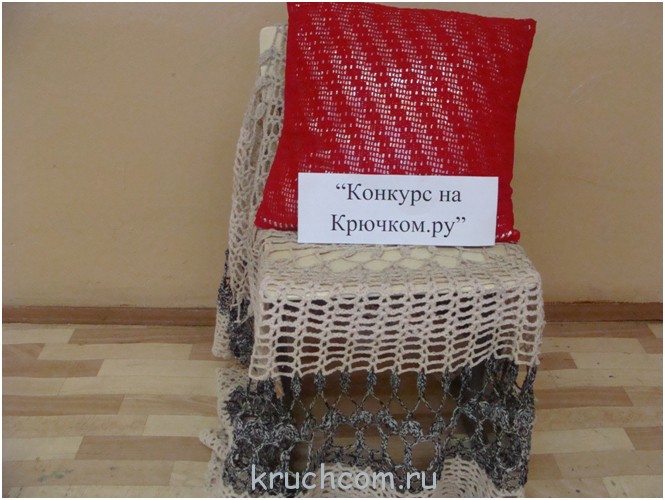
You will need 100 g viscose yarn, hook number 1.5.

Competition entry No. 22 – Knitted shawl
My name is Maria Kozlova. I am 15 years old. I've been knitting since 2nd grade. I really like this activity; every time I learn a lot of new and interesting things.

SHAWL.
You will need: 500 g. Wool blend yarn, hook No. 3.

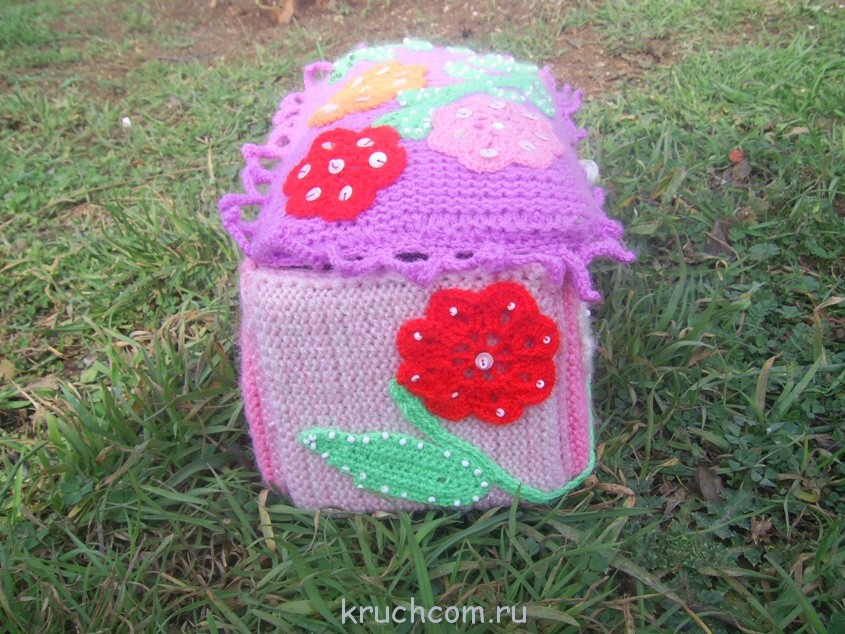
Competition entry No. 21 – Knitted boxes “Poppies” and “Sunflower”
Hello! My name is Lilya Tokmacheva, so I decided to continue the theme of knitted boxes, they are very easy to knit and will always come in handy around the house! I knitted these boxes as a gift for my little nieces for the holiday on March 8 (unfortunately, it is no longer possible to photograph them with a sign)!
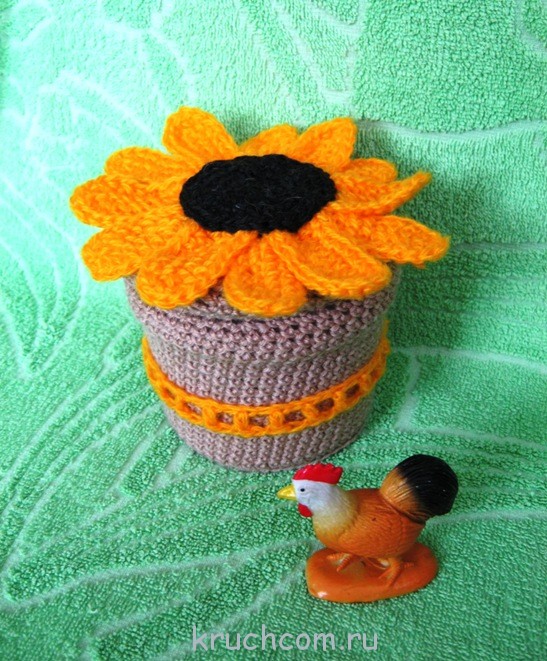
Box “Poppies” and “Sunflower”, the base consists of a plastic salad jar, the lid is also plastic. The scope for imagination is unlimited, you can use any yarn, any colors you like!
I used leftover red and green yarn for "Poppy" and leftover yellow and beige yarn for "Sunflower".
Donyshko knitted with single crochet stitches of the required diameter in a circle, adding 6 stitches in each circular row. Then we knit a row behind the back wall of the loop without adding, continue the next rows in a circle to the desired height (if you need to make decreases somewhere, for a tight fit. We knit in the same way inner part(in a different color), then insert it inside and connect the 2 parts with single crochets, we get a jar inside. cover we knit in the same way, the jumper is 7-8 ch, we tie 2-3 rows in a circle, sew it to the lid and the jar itself.

Poppy consists of 5 petals knitted in a circle, the middle is the same, the border of the box is knitted from ch.
Sunflower- cast on 9-10 ch and knit in the round, making 2 additions at the end of each row, knit 4-5 rows in total!
We invite you to take part in. Send your work to our email address [email protected].

Competition work No. 20 - Bouquet of daisies (competition conditions)
Hello! My name is Svetlana, I am 34 years old. I live in Kyiv. I love knitting and get a lot of pleasure from it!

For chamomile we need: Iris yellow, white and green; Yellow acrylic threads - for the vase. In addition, you will need a thin needle, PVA glue, wire (for the stem and thinner for the leaf).
Click Class
Tell VK
Greetings! Spring is coming soon, how about you? And so it’s time to prepare for the long-awaited International Women’s Day. And it will take place on March 8th. So it's time to do some crafts. Think about which gifts we will give to loved ones, sisters, girlfriends, grandmothers and aunts.
In general, today’s selection of master classes and ideas is aimed at preparing for this holiday. So that the children have time to create something homemade for congratulations. Of course, there will be ideas for children in junior and preparatory kindergarten groups. But still, they will not be able to complete the craft on their own; they will need the help of a teacher or one of the elders. There are also more difficult options for students at school.
Separately, I would like to draw your attention to the fact that the site has separate wonderful articles on creating small ones. I advise you to look through these collections. Because each of them has new and interesting master classes, both for kids and adults. I see no point in repeating them here.
And we, perhaps, will begin.
We make crafts for March 8, 2019 for kindergarten with children from paper
Sadikov's crafts constantly delight us. When a child draws or sculpts something completely ordinary, but it turns out cute and not entirely understandable. The results of this creativity are stored in folders and stored for life. Then it’s interesting to take them out and watch how the baby grows. Then first he wrote the word mom in the mirror image of “amam.” Then the same mother found herself without a neck and shoulders with huge hands, but always with five fingers. In general, there is something to see)))
For variety, I will give a few ideas of what children 4,5,6 years old can do under the watchful eye of a teacher.
Let's start with a sunny flower.

To do this, take two sheets of colored paper, a printed face with a diameter of 3-4 cm, green paper for leaves and a thin stick. Instead of a stick, you can take a cocktail tube, wire or kebab skewer. I think it's safer to use a straw.

We fold both red sheets in height into an accordion, alternating the sides of the folds.

We find the middle of our folded “accordion”. And we fix it with an elastic band, tape, thread or stapler.

We give the edges a semicircular shape to indicate the petals.

Unfold the blanks. Now in each of them you need to glue two edges.

We fix the tube, skewer or stick inside the blanks and glue the two remaining sides together.
Glue the leaves and the muzzle into the middle. And that’s it, you can give a sunny flower.

You will need two sheets of colored paper (red and green) and yellow cardboard, thread, glue, scissors.
We cut the red leaf into three parts and roll each of the resulting strips into an accordion. We tie the center with thread.

We glue the edges of each piece together.


You need to cut a vase out of yellow cardboard. It can be of any shape, it is important to leave a long base. We will bend it and the craft will stand on its own.

Glue flowers and grass onto the vase.
Now let's figure out how to make an envelope with tulips.

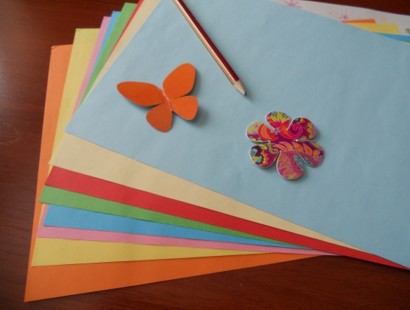
Let's take: three green strips with dimensions of 1 * 10 cm, a double-sided blue sheet of paper, three circles of pink, orange and red paper with a diameter of 4 cm.
We shape the top into a semicircle, and cut off 1.5 cm from the curved sides.

Now you need to take the circles and fold them evenly in half.

Let's put everything into each other, holding it tightly with our fingers.

And we'll make a cut inward. This way we will form a tulip or bell shape.

Glue the adjacent sides of all three blanks.

Glue the green stems onto the blue base. And we will decorate their tops with tulips. You can cut out a miniature rectangle and glue it onto the stems. In this place write wishes to your mother.

You need to take this form as a basis. You can print this photo or transfer only one part of it to paper and attach it to the monitor screen. The sides must match completely and be absolutely identical.

Using a ruler, carefully fold the workpiece in the middle.

Also, relying on this ruler, we bend the place at the bottom of the mug and saucer on both sides.

You can decorate as desired. For example, a pastry napkin, flowers made of plasticine or seeds, or paper.

I was also amused by the idea of creating tulips using a disposable fork.

Of course, there will be more simple ideas below. In this section I have allocated quite simple master classes.
We make crafts with our own hands from corrugated paper
Now there are ideas for those who are older. Let's make a mimosa and a couple of bouquets from lollipops and corrugated paper. These ideas will come in handy as small and cute gifts for friends and sisters.
The amount of material depends on the number of colors created.
To begin, cut a strip of 3 cm * 5 cm. Make a fringe up to the middle width. We wrap it around the chupik and fix it with hot glue or tape.


Cut off the top in the form of a semicircle. We expand the part.
We pierce the middle and insert a lollipop. We fix the skirt from the bottom with tape or a heat gun. And we make another one just like it, but in a different color.
You no longer need to wrap it tightly around the candy. You can straighten the edges a little. We also fix the bottom.

It turned out beautiful.


Another version of a bouquet of candy canes.

Let's take: 2 cm penoplex or polystyrene foam, a polypropylene pipe with a cross-section of 25 mm, a craft knife, a heat gun, organza, corrugated paper and scissors.

We take a pipe and polystyrene foam. We prepare a round blank from it and fix it to the pipe. Wrap it in red corrugated paper and insert lollipops. Just for better fastening, add a drop of hot glue onto the stick, leaving a space from the tip.


Now we will form the petals.
You need to form 5 rows of them. For the first row we take blanks 5*10 cm. You need 10 of them. For subsequent ones, we cut out rectangles in the same quantity, but with dimensions of 5*13 cm.

Let's give them a little petal shape by rounding the top. And with your fingers or a bamboo stick we twist the top and stretch it a little to the sides.

We fix all our petals on a heat gun, maintaining the order of the rows.

We decorate the bottom with leaves made of green corrugated paper.

We wrap the pipe with it. For beauty, you can decorate the bouquet with ribbons.
We need to cut long strips of 2 cm wide from yellow corrugated paper. Cut the fringe to the middle.


Roll the yellow fringe into a roll, straightening the tops. When you think that the flower is already tight, cut it off from the strip and fix the edge. So that he doesn't turn around. Glue it to the stem. We form a branch as shown in the figure.
We cut out leaves from a green leaf, also creating a fringe along the edge.

For the base, you can roll up cardboard or take a plastic cup and cut it to length. We insert our branch, treating the joints well with glue.

It turns out to be a pretty realistic mimosa.
The most beautiful souvenir ideas from scrap materials
Here I have collected interesting ideas for ready-made crafts from different materials: plasticine, salt dough, felt, sponges, pebbles and napkins.
I'll start with an idea. I love how imaginative people use children's handprints.

They are used to form flowers, bouquets, and the sun.

The palms themselves with the fluttering happiness contained in them.


Prints are also an interesting idea.

Using this technique, napkins are used to make airy dandelions.

The palm can be folded as if it were holding a bouquet.


Or you can ask the children to draw buds with fingerprints.


The plots can be different, just buds or symbolic numbers.


And here is the video on how to prepare salt dough.

It's great that now there is soft plasticine with many possible colors. It does not need to be crushed and kneaded in your hand for a long time. You can create right away! And the colors are all bright and colorful. We buy our child a palette of 18 shades.
So, let's start with the green color from which we make a circle and stems.

We put another piece of plasticine on top.
Using a stack, we form petals at two levels and draw veins on them.

The result is a similar blank.

Now we will sculpt the buds. To do this, we roll balls of different colors, such as pink, red and yellow.

Roll them into a sausage.

We roll up snails from sausages. We fix them in the middle of the bouquet.

It turns out like this. All that remains is to add a bow and inscriptions.

From these same snails you can form a symbolic eight.

Or just flowers.

A more complex version of sunflowers.


More craft ideas.


The technique of applique from plasticine balls is suitable for both small and large children. Well develops color perception, imagination and fine motor skills.

This mimosa can be safely put in a frame.


Often they act as a base, which is decorated with flowers.

Or you can use the buds themselves to create the shape of this number.


In crafts, use the 3D effect when the blanks can go beyond the applique.

In this version, the entire eight is a greeting card.

Contrasting colors of parts and voluminous blanks make the gift more interesting.

For those who love something unusual, the idea of creating a gift topiary from coffee beans.

I liked the option of decorating the numbers with wads of napkins. Simple, but tasteful.

I was simply captivated by these delicate flowers.

Of course, I will provide a template for this figure.

Based on it, you can make this option.


Momosa is created from crumpled parts of a napkin.

My daughter and I made a similar craft from self-adhesive paper. It is quite dense and bright.


It has already been noted that flowers from napkins turn out more delicate and airy. This fact is very noticeable on this postcard.

The idea of a fan is also common. 
Here the tulips are beautifully made using the origami technique. These are ideas for schoolchildren.

Another interesting design for a wall newspaper.

As an option for simple tulips. Showing it once is enough so that the child can repeat it. For gluing, I advise you to use PVA glue. It is recognized as one of the safest for children. They say that you can even eat it without getting poisoned. But I think it’s better not to let it come to that.

The next photo shows a detail from the technique that we did in the first section.

Gift cards in the form of mugs with baby faces.

Another idea from palms, but in the form of daisies.

Chamomiles can also be made voluminous, as shown here. A 4-5 year old child can also handle it.

These fantasy flowers are made using a similar technique.

These ideas can be repeated from felt and foamiran. Buttons are used for decoration.

A fun and cool applique with half of a disposable mug. For 30 children you need only 15 pieces.

This craft is quite original and amazes with its selection of shades.

Tulips using the same technique, only carved a little more realistically.

Another option.

Congratulations card.

Nowadays it is quite fashionable to use egg trays for crafts. Here is one possible way to use them.

Let's return to napkins again.

You can also make an applique from ordinary dishwashing sponges.

Simple panoramas always delight children.

The pebbles and beans have a nice round shape. They are easy to paint and are often used for decoration.

Plasticine and cotton swabs also come into play.

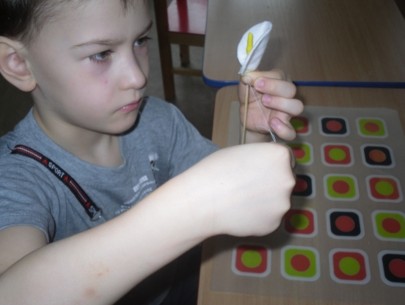
Gradually we switched to cotton pads. Calla lilies, bells and roses are made from them.

And even dandelions that have already lost their sunny color.

Pasta and seeds are in use. Why not? I wrote about pasta crafts.

White beans are here too.

Disposable spoons also allow for flights of fancy.

To do this, the cuttings are cut and the sharp edges are singed.

It is better to paint them with acrylic paint in several layers after drying.

Here's a craft you can submit to the competition!

Roses from spirals are made very simply.

Another beautiful idea in the form of gifts.

Napkins, cotton pads and a sleeve allow you to create such an applique.

These callas can be created from cardboard, paper, felt and foamiran.

It was an original idea to use ice cream sticks.

Volumetric flowers made from paper strips will also appeal to many people.

Card ideas for moms in the form of dresses and dads.

Grandma will love this craft in the form of an apron.

You can also look at muffin tins from a different angle.

This tree simply gives you a good mood and a feeling of spring.

They came up with an idea to make an umbrella out of bags with buds.

Idea for congratulations in kindergarten.

Foamiran flower with patterns.


Inspired? But that's not all!

Most often, the disc is cut into smaller circles.

Wrapped in roses.

They make a variety of daisies.

Master classes for primary school students
And I’ll start with such a beautiful craft. Although it is simple to do, it looks simply amazing!

You need to take thick paper, pencil, glue, scissors, a background from newspaper or for scrapbooking, gouache or acrylic paints and a frame.
On a 7*7 square we draw a snail or a spiral. It may not be smooth - that's normal.

We cut the workpiece along the lines and, if desired, paint it in the desired color.

From the outer tip we begin to roll the part into a spiral.

Straightening the edges. Secure the tip of the flower with glue.


We need 16 of these roses.

Take a photo frame. We paste a newspaper background onto the backing and fix the roses in a beautiful shape of a square, rectangle, circle or heart.

Now several schemes for creating some types of flowers.

Everywhere in the diagrams step-by-step tips are given.


Another photo master class on how to assemble an aster from paper. To do this, you need to take a long strip 5 cm wide. Fold it in half. And from the fold side, cut the same fringe to the middle of the strip. Then we roll it up and the aster is ready.

Here is a postcard idea - hugs.


You can repeat it using this diagram.

Another photo of a master class on daffodils made from circles.


For a square workpiece we look for the middle and diagonals.

We make cuts along perpendicular lines to the middle. 
We bend the edges over each other and fix them with glue.

This is what happens in the end.
For the rods, take cocktail tubes or fuzzy wire. You can roll up a sheet of paper.
One end needs to be glued so that the bud holds better.
We make flowers using the kanzashi technique. To do this, you need to cut six squares of ribbon 3 or 5 cm. Each flower has six petals.
We roll them up according to the diagram. We fix the ends with a heat gun and singe them over the fire.
The following blanks are obtained.

We connect them by closing the middle with a button or bead.
Now we cut out two circles from cardboard, 2 cm wide. The top one is 7 cm in diameter, the bottom is 10.
We wrap them with green tape, securing the edges and connecting them to each other.
Decorate with prepared flowers.
It is assembled according to the principle of chess.
Another eight, but made of paper and decorated with circles.
Circles can be made of the same diameter or of different diameters. It's up to you. My task is to give you an idea and direction for creativity.
Let's fold all the blanks in the center.
We take a contrasting circle and glue the folded blanks one after another in its center.
The result is a fan detail.
We cut out the figure eight shape, I gave the diagram in the previous sections.
Cut out the workpiece.
We roll it with the thumb towards the little finger.
Curl your fingers outward.
We form a pistil and stem from shaggy wire.
We fix the bud on it.
Just bravo to the master for coming up with this!
Make the base according to these dimensions. We do not cut off the dotted lines, but bend them.
We bend along the lines and glue the edges and allowances.
Decorate with ribbons and napkins for desserts.
You can put a floral sponge or polystyrene inside so that all the flowers hold tightly.
Another simple rose idea for you to check out.
We did something similar when we created the aster, remember? So, the appearance of the future flower depends on the width and length of the fringe.
DIY templates and coloring pages for creativity on March 8
Flowers that last and never wither can be made using the following templates.
Cut out the templates and bend them in the center. Glue it together and the craft is ready.
Here are the diagrams with templates.

Now it's time for the coloring pages. Let me remind you that they can act as a basis for plasticine, cereals, glitter or napkins.


Thank you for your attention! I would love to hear your opinion on this collection. Also, bookmark the article to take advantage of the ideas that interest you.
Tweet
Tell VK
As a rule, all children, under the guidance of teachers, make crafts for March 8th in kindergarten. The materials will be useful for children in the primary, secondary and preparatory groups of kindergarten.
However, if for some reason the baby does not become part of a large children's group, he can make a surprise at home if one of the elders helps him with this.
To create an impressive craft for mom with your own hands, you can turn any detail that is at hand into an original and beautiful souvenir or postcard.
Card with chamomile for March 8
For March 8, you can make a charming card with daisies. We make the base of the card by folding a pink sheet of cardboard in half. Glue a green circle to the front of the card. To make daisy petals, we need thin strips of paper, which we twist with a stick or pencil.

Glue the twisted strips onto the green circle. We decorate the center of the circle with a twisted curl of yellow paper. We have the first daisy - the upper part of the future eight.

We frame the outline of the bottom of the figure eight with green leaves. Glue a small chamomile onto each of the leaves. We make small daisies in the same way as a large one, only we fold the paper strips in half. We complement the craft with yellow flowers. Postcard for March 8th - ready!

Postcard with a paper tulip
You can make a very beautiful postcard with a voluminous tulip from colored paper. Cut out a circle from yellow paper.

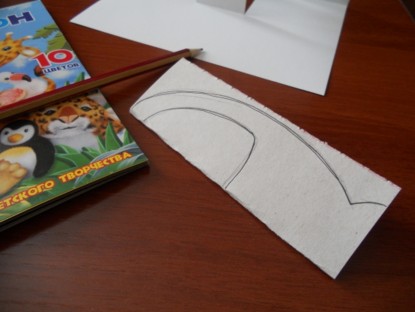
Fold the green paper in half and draw half a leaf on the fold. When cutting out, we get an even leaf with the center on the fold. For the postcard we need two leaves.

Fold a sheet of red cardboard in half - this is the base of the postcard. Cut out tulips from pink paper.

We fold the yellow circle around the edges. We glue the pink paper blanks together to form a three-dimensional tulip flower.

Glue green leaves and a tulip flower to the top of the yellow blank. We cut out a narrow strip of green paper, which we twist into a spiral. The green paper strip will curl into a graceful curl.

Glue the curl to the bouquet. Glue the bouquet onto a cardboard base. A postcard with a voluminous tulip for March 8 is ready!

Here is a postcard using the same technique, but made a little differently. The ribbon bow gives this card a special charm.

Bouquet with tulips for March 8
Flowers and tulip petals can be glued onto the paper parcel itself. We fold the bundle along the edges, forming a paper bouquet. We glue ribbons to the edges of the package and tie them with a bow. We got a simple and beautiful bouquet.

How many children there are, so many options for making a paper bouquet for March 8th. You can put together a real exhibition in honor of mothers!

Postcard with a picture for March 8
A stunning postcard for March 8th can be cut out of paper. Fold the album sheet three times. We cut out a figure eight on one of the parts, and cover the other two parts with a floral pattern.

We color the card in delicate pink and lilac tones.

After the paint has dried, we decorate the craft with patterns made with a silver helium pen. When all three parts are folded in front of us we will have a very beautiful postcard for March 8th!


 Postcard with "eight" (with a surprise)
 Crafts with the “eight” for March 8
The classic version of the craft for March 8th in kindergarten is a figure eight made of paper. We cut out the base of the craft with a stand from thick cardboard.

We glue the stand and decorate the figure eight with patterns and flowers.

Another craft for the smallest kids is the “Eight” applique. The teacher cuts out figure eights in advance and prepares decorations from thin paper. The kids’ task is to glue the decorations onto the figure eight, trying to do it neatly and evenly.
 Figure eight applique
 From ordinary and metallized cardboard you can make very simple but colorful crafts “Basket with tulips” and “Tulips applique”.
 Paper craft for March 8 “Basket with tulips”
 Crafts for March 8 with flowers and bouquets
You can glue together a luxurious spring bouquet from colored paper folded like an accordion.

Using green and red paper you can create a spectacular tulip applique.

The core of a button can also be made into paper flowers. Such a bouquet will become especially original if you place it in a voluminous palm. To do this, we outline our hand, cut it out, glue only the base, and on top of it - flowers, which we cover on top with our fingers.

Using the same principle, you can make an entire picture out of paper. And if you glue the fingers first, the brush will turn the other side.

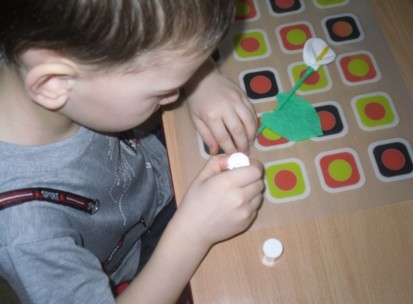
You can turn cotton pads into equally impressive calla lilies. We make the stem from a cocktail straw, the core from a cotton swab, one tip of which is painted yellow. We wrap the core with a cotton pad and the stem with a wide sheet of paper. The flower is ready!

You can make a whole bouquet out of kaal and corrugated paper.

You can make an original “dress for mom” bookmark from paper and ribbon.

Cocktail straws are great for using as stems and for creating paper flowers, which make a beautiful bouquet when wrapped in wrapping paper.


An incredibly beautiful craft for your beloved mother - “ “.

Postcards for March 8th to kindergarten
A very beautiful craft for March 8th can be a postcard decorated with a tulip using the origami technique.

Folded burgundy paper makes spectacular roses. By placing the roses on the heart we will get a wonderful postcard for March 8th.

A lovely card with a heart can be made from colored paper. We make the bottom part of the card, not forgetting to write a confession for our beloved mother.

We decorate the top part of the card, decorating it with lace and flowers.

We put a rivet or brad, allowing the card to open and close.
 Paper card "heart"
 Postcard for March 8 (with movable part)
A postcard with .

Heart with roses and ribbon
It’s very interesting to see a heart panel with roses. We fold the roses themselves using a stapler or glue according to the pattern.

Cut out a heart from red paper and make many holes around its perimeter. We insert the ribbon into the holes, processing the edge of the heart.

We glue the stems with leaves, as well as the roses themselves, to the heart, forming a festive bouquet. Glue a ribbon bow at the bottom. Panel with roses for March 8th - ready!

A very beautiful heart-shaped card can be made using the popular scrapbooking technique. The base of the card is a heart made from special textured paper with a print. The scrapbooking technique is characterized by volume and layering. Some of the card decorations you can find at home, and some you can buy in scrapbooking kits. Anything will do: figurines, flowers, ribbons, paper cutouts and pictures.

We place all the details of the craft on the base, trying to give the composition a finished, beautiful look. Scrapbooking postcard in the shape of a heart - ready!

There is another option for a luxurious postcard for March 8 using the scrapbooking technique. We make the base of the cardboard card. Cut out the front side from colored paper with a print. It should be 3-5 millimeters smaller than the cardboard base on each side.

Glue the ribbon along the card. We glue openwork paper figures, flowers and a congratulatory inscription to the front side. Some things you can cut out yourself, and some you can find in special scrapbooking kits. Postcard for March 8th - ready!

Craft for March 8th from corrugated paper
From paper and cardboard you can make a very impressive three-dimensional application for March 8th “flowers in a vase”. Cut out a vase from blue cardboard.

Glue flowers from corrugated paper.

 Application for March 8th “flowers in a vase”
 A very beautiful three-dimensional applique for March 8 is made from yellow corrugated paper. We form a flower bud from yellow paper.

The buds rolled from yellow paper are wrapped in green paper. Green paper is rolled into a thin tube. We get a flower and a stem.

The flower is complemented by green leaves and attached to a round cardboard base. Volume applique for March 8th - ready!

Bouquet of tulips made of corrugated paper
Another wonderful craft for March 8 made from corrugated paper is a bouquet of tulips. Let's start with one tulip. Cut a strip of yellow corrugated paper and twist it in the center. We fold both parts on one side.

We need a bunch of stamens on a wire (we fix them with adhesive tape). Roll a ball out of yellow paper. We put it on the wire.

We begin to wrap the ball with stamens with petals.

When the bud itself is ready, fix the green petals with adhesive tape.

Spring bouquet of tulips made of corrugated paper. Read the detailed master class.

You can make a three-dimensional card with a whole bouquet of flowers from corrugated paper.

Sweet crafts for March 8
The craft “bouquet of lollipops” looks interesting. Decorate the lollipops with paper flowers. We fix the sticks in a transparent plastic cup using plasticine. Those with a sweet tooth will surely enjoy crafts made from candies for March 8th. You can put paper flowers on lollipops and place them in a pot of plasticine.

You can use chocolate candies instead of lollipops for crafts. They will need to be pierced with a thin stick, which we will fix in the pot. We wrap the candies in corrugated paper and secure with glue. A luxurious bouquet of sweets for March 8th is ready!

It’s not at all difficult to make, and the result is tasty and beautiful. For a detailed master class, see ““.

Watch the video on how to make a beautiful bouquet of purple tulips candies
Craft for March 8th “Flower stand”
A very bright and interesting craft for March 8th is a “flower stand”. To make it, fold a green sheet of paper in half and make cuts of different lengths on it.

We glue the cut green leaf onto the base - an ordinary sheet of cardboard folded in half. We glue some of the protrusions onto the base, and bend some of the protrusions in the opposite direction (we do not apply glue to them).

Glue flowers onto the curved protrusions. We decorate the back and bottom of the craft with flowers, butterflies and congratulatory inscriptions.

Eight of ribbons - a gift for mothers and grandmothers
A very bright and beautiful craft for March 8th - a figure of eight made from ribbons. It is very easy to make, but looks very impressive and festive. First, cut out a figure eight from paper or cardboard.

We wrap the figure eight with pink ribbon of medium width “overlapping”. Fix the ribbon with glue.

When the entire figure eight is wrapped, we make a pendant loop in the upper part. From folded pieces of glued green and scarlet ribbons we get a festive bouquet. Eight of ribbons as a gift for mom - ready!

Bouquet of felt tulips for March 8
A very beautiful soft bouquet of tulips for March 8 can be made from felt. You can find a template for cutting out a tulip at the end of the article. For each flower, cut out two parts for the bud, two parts for the leaf and two parts for the stem. Sew the stem and bud
We sew together the parts of the leaf and sew it to the stem. We make several of these flowers. We made a charming spring bouquet for March 8th from felt!

You can make a beautiful bouquet of violets for March 8 from felt and thick drape. We make the pot stand from dense brown material rolled into a roll. Such flowers will never wither and will delight you for a very long time.

Craft for March 8 - painting from salt dough "Roses"
With the help of adults, you can make a very beautiful wall panel from salt dough. To do this, mix the dough with green and red paint. To prevent the dough from crumbling, add PVA glue when kneading. We prepare the base of the craft - a frame with thick cardboard. We start by making green leaves, which we glue onto cardboard.

We make narrow strips of red dough, which we then twist into buds.

We frame the buds with petals made of salt dough - we should get quite lush flowers. We leave the two buds as they are and glue them to the base in the same way, adding a small stem of green dough. We will get a wonderful picture with bright colorful flowers.

Ideas for crafts for March 8 from different materials.
Plasticine and a disk make a wonderful “Spring Rose” applique.

From a cardboard roll you can make very delicate, cute gift wrapping: Craft for March 8th from foam rubber
Another beautiful applique with a figure eight is made from painted pasta.

You can make a luxurious applique of red and white buttons as a gift for your mother on March 8th. We cut out the base for the vase from white paper. Decorate the vase with white or transparent buttons. We draw the branches with a black pen. We decorate the branches with red buttons. The bouquet looks interesting if the red buttons are of different sizes and shapes.

An incredibly beautiful and delicate craft for March 8, “a bouquet of daisies,” is made from a very unusual material - plastic bottles.

Drawing “Mom on March 8”
There will probably be talented artists among us who can draw a beautiful portrait for my mother. First, we make a pencil sketch.
Template for cutting out “card heart”
Crafts for March 8th in kindergarten reviews:
Mommy is beautifully drawn, but I will never draw it like that))) (Sasha)
Photos of new handmade crafts are published here and you will find new gift ideas for your mother, grandmother, sister, friend, as well as master classes with a step-by-step description of the work. They will help you make original crafts for exhibitions and competitions in kindergarten and school. You can submit your work. We are waiting for your photos in 2019! The most beautiful pictures will be published on the website, and the authors will receive diplomas.
From paper
What can you give to your mother, friend, school teacher, or kindergarten teacher on March 8th? For example, a beautiful bouquet that will never fade. Or an original handmade postcard. Making such gifts will bring the joy of creativity to their creator, and the result will delight loved ones.
Flowers
"Crocuses" as a gift for the teacher. Trotskaya Anna.
The flowers are made of yellow corrugated paper with green leaves, glued to a skewer. .
"Unfading Bouquet" Solodovnik Anya Valerievna.
I present to your attention a bouquet of flowers.
For the flower you will need 5 squares of the same size (4 - 6 cm) and a skewer wrapped in corrugated paper.
The number of flowers depends on the size of the vase. I have added other types.
You can dilute the bouquet with flowers that you like.

Video on how to make these paper flowers:

More souvenirs and crafts for an exhibition in an elementary school:
"Flowers for Mom." Maryukhno Ulyana.
Flowers made from double-sided paper are folded using the origami technique, with a corrugated wrapper.

"Meadow of Flowers" Shvets Karina, 9 years old.
The picture is made of paper. The background is printed, the rainbow is made of triangular modules. Flowers technique applique with beads.

"Lily". Shvets Karina, 8 years old.
Made of paper in the shape of a ball. .

Video, step by step:
“For you, dear.” Korshunov Ivan.
Cart with . Material: paper, cotton swabs, toothpicks, polyurethane foam.

"Bouquet for Grandma." Abramova Varvara Sergeevna.
Roses and petals were made from colored paper. The base of the vase was taken from a toothpick jar, covered with plasticine and then with millet. Covered with nail polish.

Video on how to make roses from paper, step by step:
Topiary “Spring mood”. Timofeeva Anna Fedorovna.
The topiary is made using the “

"Holiday tea party." Timofeeva Anna Fedorovna.
A decorative teapot for tea bags and a cupcake for sweet “surprises” are made of cardboard and wrapping paper.

"Spring mood". Trofimova Polina, 5 years old. Cherepanova Anastasia, 14 years old.
Our work is made from paper napkins and a tree branch. You need to fill a tree branch with plaster in a pot. Glue the made ones to a ball made of paper or foam. Decorate with braid.

"Forget-me-nots for mom." Oleksandra Gritsenko, 6 years old.
The work is made of paper in the shape of a ball, flowers are cut out in different sizes and glued to the base.

"Alice's Bouquet" Tokar Alisa.
The flowers are folded using the origami technique, like kusudami.

Applications with voluminous flowers - .


"Magic Flower" Bilokoz Dasha.
Using the origami technique of squares, fold the sides to the middle, and then cut off the top corner of the part.


"A souvenir for mom." Shvets Karina, 9 years old.
The work is made in the form of a figure eight triangular modular paper. Decorated with flowers and decorative stones.


"Vase with Flowers". Solodovnik Igor.
The vase is made of felt, paper flowers are glued to a cardboard base. A simple and beautiful DIY gift.

"Flowers for Mom." Sementsova Natalya.
Paper applique.

"Bouquet for dear mother." Mingulova Milana.
Corrugated paper, bamboo sticks.

"Blooming tree". Maryukhno Maria.
The tree is made using applique technique. The flowers are glued together with several layers of figured circles. Centers in flowers - stripes are twisted and glued.

"Calla lilies." Datsynka Veronica.
Bouquet made of paper. Flowers are bent squares. The middle is rolled yellow paper that is glued into the middle of the flower. Decorated bouquet in wrapping paper.

"Bouquet of flowers". Vinogradova Arina.
The work is made of colored paper, cardboard, and cotton pads.

Vase with Flowers. Polyakov Elizar, 9 years old, 3rd grade student at the Sharapovsky school in the Chekhov urban district. Class teacher Olga Borisovna Aksenkina.
The flowers are made of colored paper. Mimosa with small pom-poms made of yellow threads.
"Flowers in a vase. Hyacinths made of corrugated paper." Senior group No. 5 of MBDOU No. 267 of Izhevsk. Teacher Kochurova G.V.

"Girl spring". Collective work of the “Paper World” circle.
The girl's face is drawn in pencil, flowers are cut out of paper, glued together and glued to her hair.

Minin Alexander Sergeevich.
The craft was made for kindergarten on the theme: “Souvenir shop.”
The wickerwork is painted with green gouache. Flowers made of colored paper and PVA glue.

"Spring flowers". Filatova Maria.
The work “Spring Flowers” was made using the paper-plastic technique, the materials used were crepe paper, lilac and green, braid, ceramic vase, skewers, toothpicks.

"Gifts for beloved mothers." Group "Romashka".
The guys decided to please their mothers and prepared bouquets of flowers from colored paper.

"Flowers". Kochekova Irina Vasilievna.
The work is made of colored paper using the origami technique.

Video on how to make snowdrops from paper using the origami technique:
"Vase with daffodils." Kartoeva Rayana, 10 years old.
For work you needed: corrugated paper, a cup, plaster, cocktail tubes, ribbon.

"Bouquet of crocuses" Elena Batrakova.
The flowers are made from candy and crepe paper. The basket is made of tape reels and corrugated paper, decorated with ribbon.

"For lovely ladies." Pavlikova Dasha.
Paper bouquet. The flowers are made in the form of corrugated hearts glued to a skewer.

Postcards
Beautiful handmade cards are so cute! Here you can use any techniques - drawing, scrapbooking, quilling, add elements from fabric or foamiran. You will get beautiful three-dimensional 3D postcards.
"Postcard - handbag." Timofeeva Ulyana, 10 years old.
The base of the card is made using the origami technique, decorated with flowers using the quilling technique and decorative elements (lace napkin, glue half-beads, satin ribbon, paper twigs).
You can put a congratulations card and a little sweet surprise in this bag!


A camera made from candy and a can of coffee -

From tapes
"Family Values Box" Khuzhina Karina.
Multi-colored satin ribbons, tape base, decorative elements.


Video from YouTube on how to make a box from a reel of tape and satin ribbons:
"Bouquet for Mom." Novgorodov Kirill.
The work is done in satin.


Master class “Eight from ribbons” - .

"Sunflower". Ratnykh Misha.
Fake made from ribbons and coffee beans.

"Pencil holder." Lazarenko Violetta 10 years old.
For the work you needed: paper towel rolls, cardboard, green and purple ribbon, glue, rhinestones for decoration, ladybugs for decoration, flowers made using the origami technique.

Two more master classes on ribbon crafts were prepared by Elizaveta Dranichnikova.
Souvenir magnet «Basket with tulips"

Necessary materials:
- Beige felt – 12*10 cm.
- Satin ribbons (5 cm wide) in pink, blue, yellow and green - 50 cm of each color.
- Magnetic.
- Decorative flower – 1 pc.
- Satin ribbon (width 0.5 cm) – 15 cm.
- Braid for decorating the edges of the basket.
- Lighter or candle.
- Scissors.
- Thermal gun + rods.
- Basket template (print on plain paper).
- Cardboard for the base.

So, draw or get a basket template from the Internet. Trace on cardboard. Cut it out.

Transfer the cardboard blank to the felt. We will need two copies of felt baskets.

The basket blanks are made. A little later we will glue them together. Now we need to make flowers to see how many pieces will go into our holiday basket. To do this, take a satin ribbon (5 cm wide). Mark 5*5 cm squares. We will need 3 squares for one flower. In total, the basket can accommodate up to 11 tulips.
Fold the square in half diagonally. Hold the edges with tweezers.

Fold again, connecting the lower and upper corners.
And again in half.

Cut off the bottom tip. We process it with fire. Then we also glue the back part of the leaf using a lighter (after trimming it with scissors). Turn out the petal.


Glue the felt to the base on both sides. We decorate the edges with braid.

We prepare leaves for our multi-colored tulips. Take a green satin ribbon (5 cm wide). Prepare 6 cm long pieces.

Cut each piece in half vertically.

Fold lengthwise. Cut at an angle and glue the edges together with fire.

Take petals of the same color. Apply glue to the inner side of the leaf first. Attach the second leaf. Then glue the third leaf, closing the bud. Glue the edges of the first and third leaves together. It turns out to be a tulip bud. Lubricate the bottom of the bud with glue and place it in a green leaf.

Place the buds in a basket. First and second row. To give a more spring mood, you can add a decorative butterfly.
We make a loop from a satin ribbon (0.5 cm wide) and glue it in the center. Glue a flower or half bead to the center of the bow. We decorate our spring basket with tulips with a bow.

We glue a magnet on the back side and our souvenir is ready for March 8th! A refrigerator magnet in the shape of a basket with tulips will be a wonderful gift for any representative of the fair half of humanity!
Painting using kanzashi technique “Spring mood”
Master class on how to make a beautiful panel with flowers from ribbons as a gift for March 8th. The craft is simple and accessible for beginners, but children should do it together with adults, since the edges of the ribbon need to be scorched over a fire.
Necessary materials:
1. Satin ribbons (width 5 cm) of at least 7 colors - 50 cm of each color.
2. Green satin ribbon (width 2.5 cm) – 2 meters.
3. Stamens (of different shades) – 8-10 threads.
4. The basis for the picture (white cardboard, plastic, etc.) – A3, A4 format.
5. Braid for edging (if there is no frame) - for the entire perimeter.
6. Centers (half beads) for flowers – 7-10 pieces.
7. Decorative element (plastic, wood) “Ladybug” - 1 pc.
8. Decorative element “Butterfly” - 1 pc.
9. White felt or fabric for cross stitch – 20 * 20 cm.
10. Scissors.
11. Thermal gun + rods.
12. Lighter.

Take felt or embroidery fabric, cut out 7 circles (diameter 3 cm). The number of circles depends on the number of flowers in the picture.
 Preparing the petals. There should be a sufficient number of them. Take a green satin ribbon (2.5 cm wide). Cut strips 5.5 cm long.
 Fold each strip in half. Cut out the petal shape. Heat the edges, forming folds.
 We connect the edges at the bottom of the petal using a hot glue gun. The leaves are ready.
  Let's start production flower petals. Take a satin ribbon (5 cm wide). Cut into 5*5 cm squares.
 Fold the square in half diagonally, wrong side inward.

Fold in half again.
We cut off the ends and solder them with fire. This is what the leaf should look like.
For each flower we will need 11 petals.
 Glue the petals onto the felt circle, starting from the center.
 Now take three strands of stamens. Fold them in half. Apply a little glue to the bottom of the threads. Twist to secure the shape.
 On the back side of the flower (on felt) we glue the stamens. We place a center (bead, half-bead, cabochon) in the center of each flower.
 We prepare all the flowers in this way.
 Begin painting design. Glue 3 green leaves into the lower right corner. Please note that we apply glue to the bottom of the leaf. We will need the top one to glue the next leaf under it.
 Place the first flower.
 Add leaves and flowers in a checkerboard pattern, forming a bouquet.
 This is how the bouquet turns out. The more greenery, the richer our flower arrangement will look.
Glue the ladybug. You can go to the bottom edge, you can plant everyone’s favorite insect on one of the flowers.
 We create a frame around the perimeter of the painting.
 It seemed to me that there weren’t enough flowers, so I cut out 2.5*2.5 cm squares from a 2.5 cm wide lilac ribbon.
 I sewed a thread through the middle and pulled it together in the center. The result was another petal, but for a different flower.
  We form a couple more flowers. Glue the butterfly.

 Our picture is ready. This gift is perfect for any spring holiday and will decorate the interior.

"Flowers for mom." Sugatov Nikita.
The work is made of tights, violet leaves are painted with acrylic paints for fabric.

Video on how to make beautiful flowers from nylon and wire:
"Cosmetic bag for a friend." Popova Svetlana.
Crochet, ribbon embroidery.

From threads, embroidery
Tulip for mom. Master Class
I'll give it on holiday
Tulips for mommy -
Slender, beautiful,
Like a mother's smile!

Material for making a tulip:
- and green,
- Boxed and regular cardboard,
- skewer,
- Sewing pins,
- Files or bags,
- PVA glue,
- Hot glue,
- Scissors,
- Stationery knife,
- Pencil,
- Ruler,
- Brush.
Description of the work step by step
Using a pencil, draw flower and leaf templates on regular cardboard and cut them out. Photos 1, 2, 3


 Draw a 16x16 cm square and a 17x4 cm rectangle on the cardboard. Cut out the shapes.
Place the square and rectangle into a file or bag. Wrap the square tightly with pink thread. Apply PVA glue to the threads with a brush and let the glue dry. Photo 4
 Wrap the rectangle with green threads. Apply PVA glue to the threads too and let the glue dry. Photo 5
 When the glue dries, cut the threads on the side and remove the cardboard. It is better to cut threads with a stationery knife or scissors with thin ends. Photo 6
 The result is 2 pink squares and 2 green rectangles. Photo 7, 8

 Attach cardboard templates to squares and rectangles made of thread with pins.
Cut out all the tulip blanks. Photo 9
 Glue the petals of the pink blanks with hot glue. The result was a small and a large flower.
Glue a small flower into a large one. Glue the skewer with green thread (the skewer can be coated with PVA glue completely or just the ends), you get a tulip stem. Glue the flower onto the stem. Photo 10
 Glue leaves onto the stem. Photo 11
 A soft pink tulip for mom is ready.
"Flower pots." Puzynin Maxim.
Twine, wire, flowers.

"A gift for mom." Sorokin Artyom.
Corrugated paper roses. The bicycle parts are wrapped with colored thread.

"Bouquet for Mom." Kalinina Karina.
The picture is embroidered with a cross and satin ribbons.

"Gift for Mom." Sheshukova Ulyana.
The pillow is made of viscose fabric, decorated with sewing and cross stitch.

"For my beloved mother." Ledyaev Alexander.
The picture is embroidered with a cross and satin ribbons.

“The sunshine of good mood for my mother.” Malyshev Artyom, 10 years old, Serpukhov - 15.
To make such a cute sun you will need:
1. Yellow cardboard in the shape of a circle - 2 pcs.
2. Yellow threads - two shades.
3. Rhinestones and pompoms for the eyes and nose.
4. red fabric for a smile.
5. Glue “moment”, scissors.
I hope my sunshine will cheer you up!

"Snowy Owl" and "Summer Mix" in . Galina Egorova.


From beads
Beading is a popular type of needlework, and gifts made from beads are simply wonderful! By March 8, you can weave flowers or jewelry (earrings, necklaces, bracelets, brooches).
"Violets". Troshkina Elena, 11 years old.

"Magnet for mommy." Grichukh Polina.
The work is woven from beads on wire.

“An unforgettable gift for Mom!” Cherepanova Anastasia.
My work is made of colorful beads, several sticks, a small container, wire and thread. The petals themselves are made of beads of different colors, and the stems are made of wooden sticks, which are wrapped in green thread. A wonderful vase was made from an ordinary container, which I decorated with knitting threads and decorated with a couple of beads.

How to make simple flowers from beads:
"Bed of beaded flowers." Motina Svetlana Sergeevna.
I made the work “Bed of Beaded Flowers” from beads. Congratulations to all women on March 8th.

Set of beads and phone case. Olga Zakharova.


From fabric
"Tulips". Petrova Ekaterina.
Cotton fabric, filler.

Felt phone case from Olga Zakharova.

"Grandma in the window." Garkushin Nikita.
The souvenir for March 8 is made of nylon, ice cream sticks, and fabric.

Magnet – frame with photo “Carriage” –

"Kitty." Yanysheva Daria.
Viscose napkin, padding polyester, acrylic paints.

Hello everyone who came to my blog today! How are you feeling? I hope it's fun and you're doing well. After all, another time of year will soon come, and with it the spring holiday International Women's Day will come. And we will gladly congratulate all women on this day.
Let's present mothers and grandmothers with beautiful and original crafts that will be made with care and love.
Of course, you can make a bunch and shower your favorite girls and sisters with them. You can also make gorgeous bouquets of flowers or make original postcards and souvenirs. From this article you will learn all this, so let's go...
What can you make crafts from? Of course, from scrap materials that you always have on hand, let it be paper, cotton pads and a bunch of napkins. After all, the main thing is to come up with and then bring the idea to reality.
I really liked this craft that you can give to your mother - this is a flower. Moreover, it is made of paper, and look how magical it looks in this pot.
You will need corrugated paper, and it will need to be cut into small squares, they should all be the same.

And then glue it to the base using the trimming method. You can also make the base from a long strip of paper, twist it into a tube and glue it together. After this, twist each piece of paper prepared for this task onto a rod and glue it to the base.

Make petals and take any flower pot, you can fill it with plaster or come up with something else.

Be creative and you will succeed.

Using this technique you can create a different look.

If you want to find a more delicate option, then make the number 8 from satin ribbons and you can even hang it on the wall. Here, of course, you need certain skills to create such beauty in the Kazansha style.

Using the quilling technique you can also build a real spring masterpiece, see for yourself.

This piece looks amazingly cute and very original; even your teacher will be delighted to receive such a gift.

The most common children's souvenir is a postcard in the form of tulips or some other flowers.

I also liked this fridge magnet basket, how cool, don’t you think?
Or a small multi-colored clearing like this.

Of course, there were some protrusions, my favorite type, if you need a template, write to me, I’ll send it for free. So chic and not at all difficult, literally five minutes and your masterpiece in the form of an openwork figure eight will stand on the table and you won’t take your eyes off it.

There is an even easier option: from ordinary strips you can make such a wonderful bouquet, which both a kindergarten child and a schoolchild can do.

You can use applique, make a template of a vase or basket and decorate it with leaves and flowers.

Dads, remember they gave it to you when you were preparing for February 23, you can repay this idea here. How do you like it?

For the next great idea you will need materials, namely felt, a needle and thread and scissors. You can create such a magical and bright bouquet.

First make a base like this; you can also use satin ribbon to secure it.

Cut out the flowers from felt, and the center will be a bead.

In principle, instead of a bead, you can use something else, multi-colored pebbles or sparkles.

I was also captivated by this soft pink beauty, and why go to the store when you can make a miracle yourself. It looks like an orchid, just cool!

Volumetric postcards made of paper and cardboard
On this day, all daughters and sons delight their mothers and grandmothers with nice gifts, presenting them with cards that they made themselves during labor lessons or in kindergarten. These can be done quickly and at the same time beautifully.
I suggest you and your children make such a nice greeting card from corrugated paper; it will also look voluminous, take note. You can use this step-by-step master class in senior, preparatory or primary classes. Get a bouquet of roses or wildflowers.

We will need:
- cardboard
- corrugated paper
- satin tape
- openwork napkins for baking

Stages of work:
1. Take cardboard, preferably blue, light blue or green. Then glue a napkin to it below the center.

2. Cut strips from corrugated paper and place it on a pencil or pen and begin to twist it, as shown in this photo.

3. And then pull it out, pull it off the pencil like an accordion.

4. Twist in a spiral to create something similar to an open bud.

5. Use your fingers to unwind and fluff the product.

6. Glue colorful creations onto a napkin.

7. Cut out leaves from green corrugated paper.

8. And decorate the craft with them.

9. Make a bow from a satin ribbon and tie a bouquet.

10. Pretty good and I would say it looks charming. Creative success! Don't forget to learn a poem on this topic.

You can also make such a creative product.

With some preparation, you can make this beauty from an openwork napkin and cardboard - a daisy.

If you are looking for a simpler option, for example for the little ones from 3-5 years old, for example for the middle group of a kindergarten, then this tip may give you the right idea.

For the younger group, make a huge craft from plasticine, literally 10 minutes and you’re done. Look how great you can make it out of balloons.

Or a violet.

For schoolchildren, you can make a product from threads, like embroidery. The product itself does not use glue; the threads pass through the holes.

The idea of making the number 8 and using a music disc as a stand seemed quite interesting to me.

And this is what can come out of these materials.

The most beautiful souvenir ideas
First of all, I want to invite you to watch this video, how do you like this idea? Be sure to write your opinion at the bottom of this note after watching.
With the arrival of spring, you can notice not only flowers, but also the arrival of birds and insects. So let's make a clearing with a bee, wow, it all looks just great and very beautiful.
We will need:
- toilet paper roll
- double sided tape
- kinder surprise mold

Stages of work:
1. Take a sleeve and double-sided tape, wrap it around the entire diameter.

2. Then glue a piece of paper with double-sided tape.

3. Wrap any unnecessary leftover paper inside.

4. Take sheets of green paper of different colors, fold them in half, and then cut them into strips, as if you were making a bookmark.

5. Using a stapler, wrap the pieces onto the prepared base and secure.

6. You will get seductive leaves or grass. The base of the sleeve needs to be wrapped with paper again to hide everything that is not needed.

7. Or do it like this.

8. Then buy figurines for decoration in the store or make them yourself, butterflies, bugs, spiders, etc. Give free rein to your imagination and apply them on the grass in an original and scattered manner.

9. After this, make a blank of wings for the butterfly, which will be made from a surprise kinder case.

10. Don’t forget about the eyes and possibly a mouth, which you can draw with a marker. Here are the tones of spring charm that will decorate any home or apartment.


Use available materials, lids, cocktail straws and inspiration will definitely come to you.

There are a great many options, I never cease to admire and be amazed at times.

You see, they even used an egg carton here. And of course we used regular pasta to make another masterpiece.

As they say, who knows what, what did you come up with? Or are you still searching and don't know what to do?

Well, then you might be interested in making such a souvenir using ordinary disposable spoons, and indeed tulips came out, only unusual ones.

Undoubtedly, a basket or pot will emphasize the originality of this simple idea.

I saw this kind of work at school the other day.

By the way, you can even make dandelions or daisies from cotton swabs and plasticine; what flower does this work remind you of?

Well, there's definitely a dandelion here.

And here there are most likely asters.

Or chamomile.
Using paints and brushes you can draw a story and a greeting.

Skilled craftswomen can make a product from beads, this is of course difficult, but for those who are interested in this it will not be difficult.

For most, the palm card remains the most favorite. It’s so simple, you can even take it to a competition or exhibition.

Making crafts for kindergarten with children
With the kids, first of all, you can make all kinds of drawings for this international day. Use something unusual, like drawing with crumpled paper or a cotton ball.

Well, for joint activities, you can give such a gift to mothers and grandmothers and place it near the group at the booths with congratulations.

We will need:
- red paper napkins
- corrugated paper
- scissors
- stapler
- tassel
- cardboard

Stages of work:
1. Take a regular paper napkin, look at the diagrams from left to right. Fold it in half, then again, connect it in the center with a stapler. Then cut out a shape resembling a circle. Make small cuts along the entire diameter, and then fluff the product.

2. Cut out the shape of a bouquet from cardboard and wrap it with velvet paper, tie a bow.

3. Make leaves and let the children glue the resulting flowers in any order.

4. This is such a wonderful and magical creation, it just looks amazing, like a real bouquet of roses.

We give flowers to mothers on March 8
In this post I won’t delve too deeply into this topic, at the very beginning you already saw some ideas, now I’ll show you the simplest ones, and in the next issue there will be new items and very cool options for flowers for this Women’s Day. So, don’t miss a new note, add this one to your bookmarks so you don’t lose it.
You can make small bags out of pieces of paper for notes, look, and then glue them in a circle, this is what happens.
By the way, you can give such a charm to your favorite teacher).

Nothing seems special, but it looks cool.

Or you can use this video:
Also use coloring books, because children really love this activity. Any mother will be pleased to receive such a drawing.

You can use pictures with animals, or just with flowers.


Or at the same time even arrange it in the form of messages and wishes.

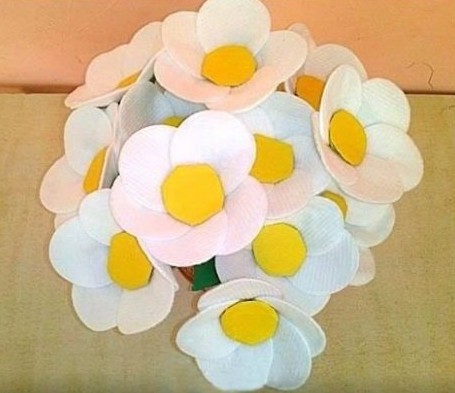
Choose any template you like, print it out and congratulate!

We will need:
- cotton pads
- scissors
- threads
- tassel
- gouache paint
- skewer or stick
- corrugated paper

Stages of work:
1. Place cotton wool on the stick; you can glue it with glue.
2. Then paint it yellow, and then wrap the cotton pad around the entire circumference of the stick, using a thread to prevent it from falling off.
3. Decorate the stick with corrugated green paper to create a stem, cut out a leaf and also wrap it on the stem.
4. These flowers will turn out white and at the same time elegant, quite beautiful and cute, super!

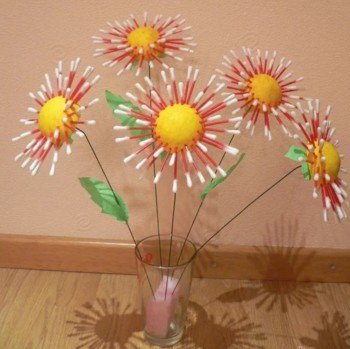
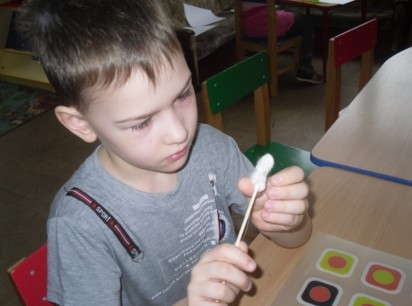
Master class for primary school students
I would like to offer you an unusual craft that will be made from yarn. You will also need a vase and your good mood, because you will get bright yellow flowers that everyone loves, called mimosa.
Next time in another post you will find instructions in this paper mimosa.

Well, now let's make such a twig from threads of yarn. Here all the steps are shown at once, all you have to do is repeat.
Now let's create a box, or such a miracle can serve as a candy bowl or vase, 3 in 1, and this can be done from cardboard, toothpicks and woolen threads.
1. Cut a heart out of cardboard and stick toothpicks into it. But first of all, first make holes on the cardboard with a needle and drop glue into them, and then stick toothpicks.


3. This is what will happen over time, you can add beads or seed beads.

4. And of course, you can play with the shapes, make it round or square.

Well, how do you like this idea? If you don’t like it, then move on to the next type of 3D greeting card, so to speak, 3D.
We will need:
- cardboard - 1 pc.
- colored paper
- PVA glue
- scissors
- designer punch
- rhinestones or scrapbooking set

Stages of work:
1. Take a white sheet of cardboard and fold it in half, make two cuts in the center 5 cm wide, like this, as shown in this photo.

2. Now bend it with your hands so that it looks like a ladder, this will be the base on which you will stick the craft.

3. Draw a basket out of colored paper and cut it out.
5. Determine the number of products yourself.

6. Now, using a special hole punch, make a decoration; to do this, take a strip 2-3 cm thick.

7. Glue this decor on the sides and the basket in the center.

8. Then decorate with flowers and butterflies, as well as rhinestones or sparkles. In general, what jewelry you have on hand.

You can use this template and make unusually expressive and pretty gerberas.
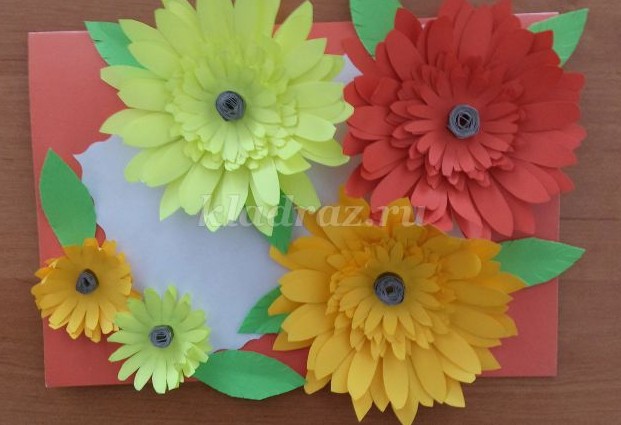
To do this, print out the flowers, and then glue them one on one so that it turns out quite lush and voluminous.

I also liked the work in the form of a fan, and there are tulips on it.

Or this postcard.


Also, such a cute wire product can be an excellent option for schoolchildren.

Or make such a souvenir from paper strips.

That's all for me. I wish that everything you plan will succeed. Creative success, inspiration and all the best and positive things! Bye-bye everyone!
Sincerely, Ekaterina Mantsurova