
Beautiful DIY headband. Do-it-yourself headband made of fabric: how to sew a headband in the pin-up style, a headband from children's nylon tights, as well as several design options for soft accessories Felt headband: master class
Starting from the first months of life, modern mothers of little princesses begin to give them a variety of hairstyles, attach hairpins and elastic bands. However, this option is not always convenient and can disturb the child. In this case, an excellent headband can be an alternative. Some versions of the presented headbands can be worn not only by little fashionistas, but also by fully grown representatives of the fair sex.

Necessary materials
To make jewelry you will need the following materials:
- Main material: any ribbon or elastic band of a suitable color, you can take a ready-made bandage.
- Material for making a decorative flower.
- Needle, thread, glue (if you have a sewing machine, you can use it).


To make a flower you need to take a fairly dense, but at the same time soft fabric; felt is perfect.

You need to cut out 4 circles from the selected material (you can make it in the shape of a chamomile). Take the first circle, bend it in half, apply a little glue in the middle, put a second bent flower or circle on top and also apply glue, you need to hold it a little until the glue sets. You need to do the same with the rest of the details.
Tights bandage
The easiest way to make a headband for a child is to use the simplest nylon children's tights. The nylon itself is quite soft and elastic material, so it is most suitable for the child’s head. When you take measurements, you need to take into account that this material stretches very well, which means you need to cut the strip a little smaller.

Tights bandage
You can decorate such a headband with rhinestones or beads, you can also place a flower, but it should be made of light materials.

The main emphasis in this headband is on the flower. To make it, you need to cut out quite a lot of circles from the fabric, then you should sew them together and tighten the main thread, and you will form a flower.

You can use several flowers on one bandage of different colors and sizes. Thus, you will get a magnificent decoration from a full-fledged flower bouquet.

In this option, you can take lace material as a basis - this will give the product softness, tenderness and sophistication.
Easy-to-make headbands for little princesses will become a real treat for future fashionistas.
Today, handmade products are increasingly gaining popularity and becoming a stylish addition to any look. This is especially true for accessories. Therefore, a headband made with your own hands will not only meet all individual wishes, but will also attract the admiring glances of others.


Where should I start?
The idea of getting an original and beautiful accessory on your head can be inspired by inspiration or arise from looking at a picture in a fashion magazine or a photo of your friend. Before you start constructing a bandage, you should:
- Adequately assess your strengths and creative potential. For those who are not particularly friendly with the world of art, it is better to select detailed descriptions for making an accessory using the simplest methods or seek help from a needlewoman who will make a custom-made accessory. Often, manual work is very painstaking, and not everyone has the patience for it.
- Choose a material that suits your taste for the base of the bandage - whether it will be sewn or knitted and from what. The imagination of handmade craftsmen is limitless, which allows you to choose the components of the base from a huge number of materials.
- In addition, you should carefully consider the decor - its appearance and components should reflect the internal state of the hostess, without taking her out of her comfort zone. The decoration of the headband should also correspond to its purpose. If the accessory is for special occasions or photo shoots, then the decor can be abundant and bright, but for sports headbands any decoration may be superfluous.
- For clarity, it is recommended to create a sketch of the future product, which will help you adhere to the intended dimensions and other details when working.
- And finally, you should make a list of all the necessary tools and parts to create the accessory so that you don’t forget anything at the store. Don’t forget about the methods of attaching the decor: sewing beads require thread and a needle, and rhinestones require glue.

photos
What can it be made from?
When choosing a material for making an accessory, you need to focus on your skills.
Knitters will be more pleased with products made from yarn of different compositions. This headband is suitable for the cold season and will not only decorate its owner, but also warm it up. Using a crochet hook or knitting needles, you can create original and cute patterns, so such products do not need abundant decoration, just choose a beautiful brooch. One of the trendy models among knitted accessories is a turban-type headband.

For those who have mastered a sewing machine, you can show your imagination and choose any fabric. Headbands can be made of cotton fabric for hot days; denim is often used. In addition, you can use knitwear and lace, and some manage to cleverly remake old things and create real masterpieces.


An unusual decoration can be created by attaching embroidered or fabric-made flowers, rhinestones and beads to an elastic ribbon. It will not take much time to make such an accessory.
As we can see, any yarn or fabric is suitable for creating a handmade accessory. If you show your imagination and complement the product with decor with a sense of style, you will get a good thing.

How easy is it to do it yourself?
Simplicity is in fashion today, so you don’t have to complete a cutting and sewing course to make a headpiece. Several simple and understandable techniques that are used in needlework will help even beginners make an exclusive accessory.
The headband with the unusual name solokha received its name thanks to the film adaptation of Gogol's stories. The heroine with this name wore a scarf on her head with a bow tied at the top of her head. Today, this model is popular in retro style, and is also suitable for brave girls to create a playful or romantic look.


Sewing such an accessory is not difficult; some fashionistas create a stylish accessory from a scarf. To sew an accessory, you will need a piece of fabric approximately 80 cm long; everyone determines the width for themselves. To keep the bow in shape, wire or child-safe padding polyester is inserted into the product.


Mothers of daughters often create headbands for themselves and for the girl in the “family bow” style. Identical accessories will be an excellent attribute for photo shoots, where headbands are often used for newborn girls.

For the little ones, it is better to choose soft materials that will not damage the delicate skin of newborns. You can use old clothes and sew such a product from a T-shirt. Two pieces of fabric need to be stretched and processed along the edges. One part is used as the headband itself, and a flower from the second piece of fabric is suitable as a decoration. The strip is carefully twisted and secured on one side, forming a bud.

photos
For older girls and girls, products decorated with flowers made of foamiran or felt are suitable. To create decor, you can take ready-made patterns or come up with shapes yourself. Usually, for this purpose, petals are cut out and finished flowers are laid out by overlapping the petals.

photos
Headbands with flowers using the kanzashi technique would be a good option as a decorative head decoration. The petals of the future flower, folded from satin ribbons, are connected to each other using a needle and thread, glue or flame. Rhinestones, beads or beautiful cabochons are used as the core.
If a girl wants to make a sports headband or a home accessory for her head, then she should choose practical and durable materials. This can be a wide terry or fleece headband.
To complement a sporty casual look with jeans, you can make a denim headband. To sew such an accessory, you will need a small and large rectangle of fabric, as well as an elastic band.
Since the material is dense and non-stretchy, an elastic band should be inserted into the smaller of the two pieces of fabric. You can decorate the finished product with a cute bow or flower made from jeans.

Quick options using improvised means
If a fashionista wants to decorate her hair with an unusual accessory, then you can create it without sewing or knitting.
Often girls create headdresses from scarves. This head decoration will be the highlight of a woman’s look. With the help of a wardrobe item that has long since become a non-grandma's item, you can tie an Arabic headband, turban or turban, gather your hair in a ponytail or braid, leave a long end at the back, or simply tie it around the circumference of your head.


In addition to a scarf, many fashionistas create magnificent headdresses from a scarf or headscarf. A very long scarf or headscarf can be left hanging at the back or tied in an original way at the front. The ends of the product can be woven into the hairstyle or tucked in.


A headband made from a bandana will be a bright accent to your look and add some daring to it. Using various ways of tying it, you can create an original look in a casual or rock style; in addition, bandanas are a favorite element in the images of many rappers.

Sewing master class
Let's take a closer look at how to create the most popular and fashionable head jewelry:
- A turban made of mixed materials decorated with rhinestones. For this you will need: two pieces of fabric 65 cm long and 30 cm wide (knitwear and stretch satin would be an excellent combination), threads, scissors, pins, rhinestones for decoration. First you need to sew two bandages from the taken fabric. Fold each piece in half with the right side inward and sew the product along the length, leaving small allowances. Then iron the seam. After this, stretch one end of the bandage inside to the other end and sew them together, leaving a small space for turning them inside out. Then turn the product inside out and sew up the remaining area. Then lay out the two stitched elements in the shape of circles and thread one part into the other. It turns out that two circles connected with each other and formed a turban. The places where the two parts are intertwined should be secured manually with threads, and the front part of the headband should be decorated with rhinestones.
Hats for girls are very important. There are never too many of them, just like handbags! This fabric bandage will come in handy if you are going to have a picnic in nature, cleaning the house or preparing dinner. Sew them more and please your close friends with a gift.
Sew them from multi-colored cotton fabrics. The canvas can be patchwork. Look, do you like them? 
Little ladies will love the headbands, rest assured. 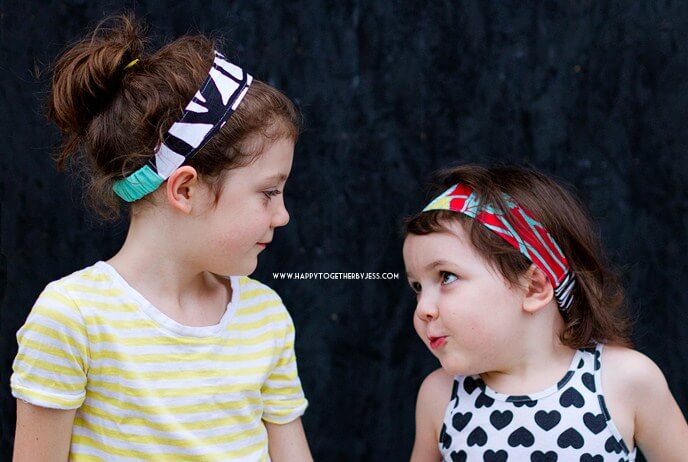
Are you ready to make your first headband with your own hands?!
What you will need:
- Template for an adult headband;
- Template for children's headband;
- Remnants of tissue;
- Small rubber band
Notes:
- Measure your head volume. If necessary, increase or decrease the length of the template;
- At the end of each line, secure the seam.
Sewing instructions:
1. Print the template and cut it out. You will have a pattern. 
2. Fold the fabric in half and cut out the two front pieces. 
3. Cut out two pieces for the back of the bandage with elastic. 
4. You will have these blanks. Make sure that the length of the elastic part is about 14 cm; 
5. Fold the pieces in pairs, right sides inside. Sew along the sides. 
6. Turn the pieces right side out. Use a pin and string. 
7. Straighten the seams and iron; 
8. Lay finishing seams; 
9. Take the elastic band and insert it into the part; 
10. Secure the elastic with a stitch; 
11. Trim the cuts; 
12. Fold the edges of the cut inward. 
13. Align the cuts of the two parts. 
14. Secure them with a machine stitch. 
This headband is very easy to sew; it takes very little time to make. Great idea, right? Its author. 
Since ancient times, the headband has been used by women to create a hairstyle and a unique style. It also performs the function of protecting the face from hair, holding it firmly. Today this accessory has entered our lives, and has so many different types and forms that it is impossible to even imagine. One type is suitable for wearing at home to remove hair while cleaning, the other perfectly highlights an evening look. This item can be worn both with loose hair and with curls gathered at the back of the head. A DIY headband can be a great addition to your everyday outfit, adding a touch of originality to it. And a thing made by you personally will always look unique.
Handmade headband with a beautiful flower
To create such a bandage, we will need a material such as felt or felt. For the base of the flower, you need to cut out a circle from cardboard and cover it with a circle of fabric that is slightly larger in diameter, gluing the edges on the back side. Next we create the flower petals. We cut them into the required shape, but in three different sizes to create tiers of the flower. First we glue the larger petals to the base, then the medium ones, and at the end the small ones. In the middle you can glue a small circle of felt or a large bead. This flower can also be made from a wide satin ribbon. You can choose one or several colors. It all depends on what outfit you will wear the headband with. To finish the job, you need to take a medium-width elastic band, sew its two ends together and attach our flower to it. The headband is sewn with your own hands, you can try it on.
Knitted headband
Another good option is to knit a warm and beautiful hair accessory. To do this, you can use any threads you have at home, or maybe you have old knitted items that can be unraveled into threads. The knitted headband is made using the American elastic technique, so that it is comfortable to put on and that it stays well on the head. First you should measure your head circumference. You will need to knit a little smaller than this size. Knit several rows to find out how many are needed per centimeter. After completing the process, you need to use a crochet hook and the same thread to fasten the two ends of the bandage. To make the headband look even better, you can knit or crochet a large flower.

DIY headband woven from satin ribbons
For this product, you can take ribbons of one color or two or three. We intertwine the ribbons with a pigtail. Each free end is either tied into a tight knot or secured with glue. We glue or sew a small piece of elastic to one and the other end.

It is very easy to make such a headband, and it will look very elegant with an evening hairstyle. You can also decorate with a flower or a piece of ribbon folded like an accordion. There are many options, choose any one you like, and you will look irresistible at any time of the day or year!
Stylish and not so stylish, with flowers and butterflies, with rhinestones or woven from beads, or simply twisted from old T-shirts... Among the enchanting variety of “store” options, a do-it-yourself headband always stands out for its individual approach to design. By devoting a little time to simple work, you can create a beautiful thing that will suit you.
Where to begin?
- Where do we start? We decide on the base, what it will be - fabric or leather, ready-made knitwear or a strip knitted with our own hands. Then the main idea for the design is required, and inspiration can be gleaned by simply looking out the window. Leaves, flowers, branches, clouds... There's a dog running, and a cat basking in the sun... By the way, a great idea for a children's decoration! A headband with a funny cat face, and maybe even a couple of kittens with bows.
- Step two is to make a sketch or template for the drawing, select the necessary materials and color combinations, and arm yourself with tools. You will definitely need: scissors, a needle, thread, PVA glue (for attaching rhinestones, feathers or sparkles). The third step is the design of the main accent, from which we will create it: fabric for applique, colored threads, ribbons, crystals, beads, textile or leather cords, the list can be infinitely long.
- Simplify your choice by simply deciding on the purpose of the decoration - for every day or for a special occasion, and begin to implement a unique idea.
Fashionable girls
It is better to make a DIY headband for little ones soft, without metal or glass in the decoration, so that the baby does not get hurt. Crocheted or knitted, with flowers and frills along the edges, with pearls or intricate embroidery, head decorations for the youngest fashionistas can easily end up in the book of records in the “diversity” category. The resourcefulness of mothers who create masterpieces from literally nothing is amazing. As confirmation - a couple of examples. 
- A bandage made from old T-shirts: two strips are cut off, the edges are stretched lengthwise and processed with a fine zigzag. The thread must be contrasting, or one tone darker than the main color. One strip makes the base of the headband, and the other makes a fantastically beautiful flower! The fabric is simply gathered into a rosette, tied at one edge, it ends up in the middle of the flower, then everything is straightened out. You can depict a violet, and from several layers - a rose. By adjusting the width, we get flowers of different sizes, and the edges can be trimmed with gorgeous golden thread or changed their shape simply by working with scissors.
- A headband made of ready-made cotton lace: the ribbon is fixed on a soft base, decorated on the sides with a frill, and in the middle - intertwined with threads and beads or embroidered with pearl beads. Despite its simplicity, the number of options is enormous, if you take into account the combinations of pattern and color, the arrangement of beads or lace patterns.
DIY headband for a girl: the simplest decoration option is in the form of a regular “braid.” Prepare the components: braid of two colors, a thread of thin plastic beads and a round elastic band. What we do: 
- We tie the folded braid and beads to the elastic band using a flat knot, as for a tie.
- We braid a braid of the required length, secure the ends with the same knot on the same elastic band, cut off the excess and hide the “tails” inside.
- If you want to make a double headband, then make another braid and fix it next to the first one.
Vary colors, textures, weaving options; instead of beads, use gold cords or leather ribbons with a figured edge. But every time there is a new unique thing and a reason to be proud of yourself and your daughter.