
How to decorate a box, make it from various materials? Cardboard box. DIY step-by-step master class: round with a lid, book covered with fabric, decorated with threads Decorating a paper box with your own hands
A box is a small square, rectangular, oval, round or any other shaped box in which money, jewelry, and all sorts of small items are stored. The product is made of wood, cardboard, plastic, and is decorated by gluing it with fabric, paper, pieces of broken glass, and pebbles. A DIY box is an original idea for a gift for any occasion.
Materials, master classes for making boxes
A decorative box-chest for jewelry, small stationery, and handicraft items is a small box or chest with several compartments. The materials for making such items are very diverse, it can be:
- natural wood;
- plywood, MDF;
- pieces of baguette frame;
- shoe boxes, large packs of juice, milk;
- corrugated cardboard, cardboard spools of adhesive tape;
- bamboo napkins;
- ice cream sticks;
- wooden bracelets;
- colored polymer clay, salt dough;
- newspaper tubes, vine;
- pieces of water pipe;
- wooden clothespins;
- postcards;
- threads, laces, twine.
When it is possible to spend significant funds on your hobby, precious and semi-precious stones and wooden cigar boxes are purchased to make and decorate the box.
From a baguette
Baguette is primarily a wooden profile for making picture frames. It is purchased in framing shops, and if you have the appropriate equipment, you can produce it yourself.
To make a chest measuring 18 by 18 cm, you will need:
- a piece of baguette 2.8-3 m long, 4.5-5 cm wide;
- three pieces of hardboard for the lid and bottom;
- two loops with fasteners in the form of screws;
- lock with fastenings;
- thick fabric with embroidery;
- PVA glue, “Moment”;
- acrylic paint.
- miter box with a fine-toothed hacksaw;
- jigsaw;
- pliers;
- screwdriver, hammer;
- knife or micro drill;
- ruler.
Progress:
- you need to cut four pieces of baguette for the lid at an angle, glue them together with “Moment”;
- Glue the lid on top, decorating it with embroidered fabric;
- saw off four more pieces of baguette to form the walls of the box, glue them together;
- attach the bottom to the baguette with screws - the latter should not be too long;
- the lid is connected to the base of the box with hinges;
- The surface of the product is painted with acrylic and varnished.
To simplify the manufacturing process, you can ask a framing shop to cut the material at an angle of 45 degrees.
From tape reels
Old empty tape reels are also used to make a small box. To work, you will need thick but flexible cardboard, colored paper for decoration, two reels of adhesive tape - wide and narrow. During creation, a circle of cardboard is glued to each of the reels, a cardboard cylinder is glued inside the wide one, protruding 0.5-1.2 cm beyond the edges of the reel - it is needed for the box to close. The finished product is pasted over with colored paper, decorated with bows, ribbons, and pieces of fabric.
Made from bamboo napkin
Bamboo napkins are available in plain colors and are decorated with beautiful intricate patterns. To make a box, a bamboo napkin is glued or sewn onto thick textiles so that its edges do not fray, rolled, and two rounded sides, also decorated with fabric, are attached to the structure. Only three sides need to be tightly connected - the fourth is decorated with a miniature lock or fastened with a button or a button with a loop.
From shoe boxes
A cardboard shoe box can be easily and quickly turned into an original box by covering it with any fabric or paper. A smaller chest is made using boxes of tea, juices, and milk. In the latter case, you need to put the box on its side, making a C-shaped cut on top, bend a piece of cardboard - there will be a lid. The structure is covered with fabric, and two satin ribbon ties are attached to the top and bottom.
From cardboard
A heart-shaped cardboard box is a great homemade gift option. To do it, you need:
- three sheets of colored cardboard;
- tape measure;
- ruler;
- PVA glue;
- paper flowers, beads for decoration.
Two hearts are drawn on cardboard the same size as the future box should be, but the heart-lid is made one millimeter larger. Next, measure the perimeter of the heart with a centimeter tape, cut out two strips of the appropriate length (narrow for the lid, wide for the bottom), with teeth along one edge, with the help of which gluing to the bases is carried out. The finished box is decorated with beads, ribbons, the inscription “LOVE”, etc.
From popsicle sticks
You can make boxes using wooden ice cream sticks - you will need at least 29 of them. You also need hot glue, some corrugated cardboard, acrylic paints in two colors, satin ribbons, a ruler, sharp scissors, and a simple pencil. Colored: 14 sticks, one color, 15 another. Two rectangular parts measuring 5.5 by 7 cm, two semicircles 7 cm long and 3 cm high are cut out of corrugated cardboard. The cardboard parts also need to be painted.
The bottom is made up of seven sticks, alternating in color; cardboard sides are glued to them vertically. Two more sides are made of six sticks each - attached to the sides. Two semicircles are connected by ten sticks - this will be the lid. The ends are covered with satin ribbon, and the lid is attached to two ribbons.
Made from wooden bracelets, polymer clay
To make such a box, you will need:
- a wide wooden bracelet or a suitable blank;
- hot glue in a gun;
- colored polymer clay, tools for working with it;
- paints, brushes;
- round cookie cutters - slightly larger and slightly smaller than the bracelet;
- white marker.
You need to roll out the polymer clay into a thin layer, squeeze out a circle with a bracelet, and bake it. Paint the bracelet with paint (for example, yellow), apply a pattern - diamonds with dots. The round baked bottom is glued with a heat gun. Using cookie cutters, two circles of different sizes are squeezed out of green polymer clay, they are baked and glued together. Leaves are cut out with a wooden scalpel, like the tail of a pineapple - they also need to be baked and glued to the lid of the box.
From plywood
A simple plywood box is made from several parts:
- four sidewalls 10 by 8 cm;
- lid and bottom - 10 by 10 cm.
The sides are glued together with PVA glue at an angle of 45 degrees - for this they are cut accordingly. Next, the bottom is glued to secure the lid, a chamfer is removed under the hinges on one of the sides and the lid itself. The hinges are screwed on with self-tapping screws, and the outer part of the product is decorated in any way.
Made of wood
Carved chest boxes are made from natural wood - linden, aspen, ash, oak, alder, birch, spruce, etc. To do this, you will need a board 1-1.5 cm thick, which is sawn to the size of the product. It is advisable to first make a sketch, and mark the finished boards and process them with a milling cutter to give them a beautiful shape. You can also decorate it manually by drawing out the blanks using a ruler, compass, or sewing patterns - the carving (usually geometric, Kudrinskaya) is performed according to a strict pattern. If desired, a drawer with a handle and several compartments is made in the box so that the product has a neat appearance; it is treated with sandpaper, tinted with stain, and covered with two layers of wood varnish.
Before decorating the chest, you need to sand it with sandpaper - first coarse, then fine.
From postcards
To make such a box you will need 4-6 postcards, floss threads, needles, a ruler, and a pencil.
Base details:
- 14.5 by 8.5 cm - two pieces;
- 14.5 by 10.5 cm - two pieces;
- 10.5 by 8.5 cm - two pieces;
- four diamonds for side inserts, length 9 cm, width – 6 cm.
- one piece 10.5 by 8.5 cm;
- two semicircles 8.5 by 2.5 cm.
All parts are covered with a buttonhole seam and assembled together by stitching - the box and lid are made separately, connecting only on one side. Any small lock or button with a loop is attached to the front.
From threads
To make such a box you will need toothpicks, cardboard, yarn of any color, an awl, a heat gun, a pencil, and scissors. First, a template is drawn on cardboard - a heart. Along its entire perimeter, retreating one cm from the edge, holes are made a centimeter from each other, toothpicks are inserted there, the tips of which are smeared with glue. Next, weaving is done like a linen one - the thread lies in a wave-like pattern. When the desired height is reached, the thread is secured and cut. To decorate the bottom, it is simply wrapped with thread lubricated with glue. The top of the structure is decorated with lace, ribbons, and beads.
From wooden clothespins
The barrel box is made from a round box of chips, such as Pringles, and disassembled wooden clothespins - you only need 12 of them. The halves of the clothespins are glued using moment glue onto a jar of chips, tied in two places with linen twine. The lid is also covered with linen rope, decorated with paper or textile flowers, a souvenir mug or a polymer clay ball.
From newspaper tubes
The tubes are rolled from newsprint, cut into strips about five cm wide, pages of old books, glossy magazines - each sheet is folded diagonally, wound on a thin knitting needle, the tip of the sheet is secured with PVA glue. To work you will need at least 18-22 tubes.
The tubes are painted, to create a box they are attached to a round or square cardboard bottom, and then braided with one long tube. When the desired height is reached, the tubes are bent and cut. Then you can weave the lid of the box, decorating it with a textile bow or flower.
From salt dough
Salty dough consists of flour, water and salt, taken in a ratio of 2 to 1.2 to 1. The dough is thoroughly kneaded, and placed in any suitable container - a jar of cream, cotton swabs, etc. For decoration, the product is decorated with fruits, leaves of dough, “legs” are attached to the bottom. Drying is done in the microwave - usually five to seven minutes are enough. The finished structure is painted by hand, covered with transparent or dark varnish, and dried in air.
From sewer pipe, MDF
A jewelry box can be easily created even from a piece of sewer pipe. For this you will need:
- plastic sewer pipe;
- rubber glue;
- a small piece of MDF or plywood;
- primer;
- cling film;
- water-based paint (for example, purple);
- glezal white, bronze color;
- gold paint;
- steel base pin;
- ball and round wooden sticks;
- jigsaw;
- drill with drills;
- compass.
To begin with, four identical fragments, five to nine cm wide, are cut from the pipe. Their edges are sanded with sandpaper to avoid burrs. Five circles with a double contour, a centimeter wide, are drawn on an MDF sheet and cut out along the outer contour. A recess is made in the four round parts to allow pieces of pipe to be placed on top.
Next, the plastic rings are put on flat MDF plugs and glued to them. In each circle, a hole is pre-drilled for the central pin, as well as a recess into which a small stick will later be inserted to prevent the “links” of the product from rotating around its axis.
Afterwards, the structure is coated with an adhesive primer mixture; when the layer dries, it is painted with purple water-based paint. Then the parts are decorated with glaze, the color of mother-of-pearl and bronze. To create the original “marble” texture, use a crumpled piece of cellophane (cling film) to blot the last layer of glass that has not yet dried. A steel pin is inserted so that it passes through all the parts, and a wooden ball is placed on the metal tip protruding from above. The finished product is decorated with golden paint, and a butterfly or bow is glued to the lid.
Instead of golden paint, gold leaf is sometimes used, in which case Mordan glue is additionally purchased.
Decoration methods
The finished box, made of any material, must be decorated to give it a beautiful, “festive” appearance. What is used as decoration:
- “kanzashi” technique;
- pasting with textiles, leather, colored paper, wallpaper;
- decoupage;
- trim with ribbons, bows, knitted lace;
- painting, hand-coloring;
- decorating with pieces of eggshell;
- mosaic from various materials;
- decoration with “natural gifts”;
- decor from figured pasta, various types of cereals;
- burning, wood carving.
Differently designed products will decorate a retro-style hall or a romantic nursery, a marine interior or a Provence room, a loft hallway or a boudoir in the Baroque style.
Pasting with fabric
You can cover the box with textiles both inside and outside. To cover the internal space, a cross-shaped template is cut out of paper, which is then transferred to fabric. It's best to take velvet. It is important to make allowances - up to one cm on each side. Next, the paper is carefully spread with glue and glued to the fabric, bending the latter so that it is not visible from the outer edges of the paper. The product is dried under a book press, after which it is placed inside a decorated box, pressed, and dried.
The easiest way to cover a round box with textiles is to measure its height, wrap the fabric around it, cut it, coat the box with PVA glue, press the fabric against it, and dry the product. The same is done with the lid. A wooden or plywood box can also be covered with knitwear - it is laid on the surface in beautiful folds, gluing only to the bottom, and secured with a stapler.
The product, covered with fur, with a scattering of beads on it, fastened with buttons and snaps, looks interesting.
Decor using the kanzashi technique
The “kanzashi” decorating technique is the art of creating flowers, leaves, birds, butterflies from fabric and ribbons. To design the product in this way, you will need the following materials and tools:
- cardboard cylinder, diameter 9-12 cm;
- felt fabric;
- cardboard;
- satin ribbons;
- organza;
- glue gun;
- sharp scissors.
Progress:
- the cylinder is outlined on a piece of felt and thick cardboard, six such blanks are made: four according to the size of the outer contour of the pipe, two - along the inner;
- the parts are connected in pairs - you get two large circles, one smaller one;
- the bottom is glued to the box, the lid is tried on;
- The parts of the lid and bottom are cut out of the fabric, they are cut, and coated with glue;
- the fabric is glued to the bottom and sides, folded inward;
- the lid is covered in the same way, but a textile loop and a wide short ribbon are glued to its inside;
- the smaller circle is coated with glue and glued to the inside of the lid;
- the inside of the box is covered with felt;
- to decorate the outer part of the lid, take pieces of tape measuring six by six cm, which are folded into petals and glued in a circle along the edge;
- Next, pieces of tape five by five cm are taken, and an inner circle of petals is made from them;
- a large bead, button, or pebble of a suitable color is glued into the middle;
- the sides are also decorated with two or three rows of petals;
- the very bottom is decorated with a wide ribbon.
Pasting with paper or wallpaper
The appearance of a box covered with paper depends on the thickness and texture of the latter. When using silver vinyl wallpaper, it is easy to create the effect that the product is covered with metal. For work you will need PVA glue, paper towels, transparent varnish, multi-colored acrylic paints, the wallpaper itself, and other paper.
Parts are cut out of the wallpaper, taking into account the shape and size of the future product, plus small allowances for tucking. The glue is applied to the back surface of the wallpaper, the paper is left for a couple of minutes to soak, pressed tightly to the box, and smoothed out. It is important to carefully ensure that no air bubbles form during gluing.

The boxes were originally intended for storing jewelry and expensive things, so they were found mainly in the homes of wealthy gentlemen.
The variety of shapes, sizes and materials used to make the boxes was amazing. They were made of gold and silver, encrusted with diamonds and other precious stones. There were also simpler wooden boxes. Centuries have passed, but the fashion for these original and elegant products has survived to this day.
It is noteworthy that making a wooden box with your own hands is not as difficult as it seems at first glance. The main thing is to apply a little skill and use your own imagination.
Where to begin
Making any craft begins with a project, a diagram. The master imagines exactly what his masterpiece will be like, and, starting from the drawings, stocks up with the necessary materials and tools.
For many ordinary people, a wooden box appears as a rectangular box with a closing lid. This is true, but not entirely. A box is a real work of art, and even a handicraft made from scrap materials can look like an expensive antique.
Any box has its purpose in the house. Based on this message, the master thinks over the shape of the product. The following options are possible here:
- for jewelry. Such wooden models have a traditionally rectangular shape, but the internal surfaces are lined with velvet, and the lid is complemented by a mirror. As a result, jewelry is not scratched and is convenient to try on;
- for jewelry, trinkets. A characteristic feature of this product are drawers that move freely inside the case. The number of retractable elements is unlimited, and a tight fit does not require special guides;
- a small box for cherished and memorable items. Made in the shape of a heart and great for storing letters, cards, photographs and other things;
- Puzzle . A rather complex product that simultaneously serves as a decorative decoration and a children's toy. A system of wooden gears, reminiscent of a clock mechanism, is installed here, and the lid opens after rotating the handle or one of the wheels;
- to hide a small amount of money. It is made in the form of a rectangle, but the external decoration is made to resemble a book;
- for needles, threads. Such wooden boxes usually have several compartments where you can store sewing supplies. The case is often complemented by a carrying handle.
In addition, there are boxes with watches, locks and secrets, original boxes and drawers for storing cigars, and products that make melodious sounds when the lid is opened. The shape is not limited to rectangular. In fact, with modern tools for woodworking, it can be anything, including round.
It is noteworthy that all of the above options can be done independently at home. But still, it is better to start learning how to make wooden boxes with your own hands with simple designs, complicating the task as skills develop.
How to make a classic box
Even a teenager with minimal skills in handling woodworking tools can cope with this task. Such a box is made from multi-layer plywood, and the selected sheet should not have visible damage: knots, cracks.
At the initial stage you will need a pencil and a ruler. In order not to complicate the task, it is better to choose the correct geometry of shapes for the walls, lid and bottom, for example, a square or rectangle. On a sheet of plywood, draw the outlines of four walls: 2 side walls are shorter and 2 front walls are longer.
Note! The sides of the bottom are calculated in such a way that after gluing the sides, it is recessed inside the walls.
Then all the drawn elements are carefully cut out with a jigsaw, the irregularities are processed with sandpaper. To ensure that the end and side walls are beautifully connected to each other, small grooves can be made at the edges of the ends, corresponding to the thickness of the plywood sheet. This tip will help give the case a monolithic look and overall make the structure stronger. The walls are glued together, then the bottom of the box is placed. If the lower part enters with difficulty, the edges are processed with a file. The bottom should fit tightly.
After this, they begin to make the lid. To make the design more original, it is better to choose not a flat, but a deep lid. For this, the scheme described above is used. A large blank is cut out, which will directly serve as the lid, end and side walls. In essence, it turns out to be a smaller copy of the casket body. All parts are sanded and glued together. The lid is attached to the body using small hinges. After assembly, the finished product is varnished or painted in any color you like.
In a similar way, you can make a box from solid wood. A wooden board is used for this. It must be sanded and cut into pieces of the required size. It is more difficult to cut wood with a jigsaw; it is better to use a circular saw. Curly edges can be made with a router.
If you need a drawer
In general, a wooden box with a drawer is made in the same way as the classic version, but there are a number of features.
A simple rectangular shape of the lid and bottom will spoil the appearance of the product. It is better to make the long sides of these elements wavy using an electric router. In addition, by choosing this option, the lid and bottom are not placed inside the body, but left outside.
The walls are made of different heights. In particular, the back part and ends are made of the same height and glued together. For the front wall, cut out a die half as wide as the back part. This element is not recessed between the ends, but is installed overlapping and fixed with glue.
The box consists of two parts: the box, which fits freely between the walls, and the front part, which is similar in size to the top die. The elements are also mounted on wood glue.
A partition is installed between the upper and lower parts, which will serve as the bottom of the upper compartment of the box. Inside the retractable and stationary drawers, you can make partitions from thin plywood, delimiting the internal space into several compartments. The lid is installed on decorative hinges, the wood is covered with several layers of furniture varnish.
How to decorate with carvings
Carved boxes look much more original and interesting, but such work requires certain skills and knowledge. For beginners who decide to try their hand at wood carving, experienced craftsmen recommend starting with simple geometric shapes and large patterns. With a certain amount of patience, even a novice master will be able to cope with such a task.
The drawing is applied to the surface with a pencil, each line is well drawn. After this, the pattern is carefully cut out with an oblique knife or chisel in strict accordance with the applied markings. Small flaws and irregularities can be corrected with a file or fine sandpaper.
How to put a lock
An interesting solution is a mortise lock, which will be opened with a small key, but such work is difficult to do even for an experienced specialist. Therefore, it is better to limit yourself to a padlock or a decorative hook.
To install a padlock, loops are placed in the central part of the side wall and lid, which are screwed with small screws. The location of the hinges must be calculated in advance: even a slight displacement will break the symmetry, and the box will lose its attractiveness.
Making a box of complex shape from solid wood will take much longer. To do this, you must use a power tool, while parts from plywood can even be cut with a hand jigsaw. A large field of work opens up for the artist to design the finished product. You can paint it with paints, attach decorative fittings, decoupage or burn it.
After reading about how to decorate a box, you will find out that it is not at all difficult. And you can make such things from a milk carton, a reel of adhesive tape, or a wooden bracelet.
How to decorate a box with painting?

To create a masterpiece like this, take:
- box;
- oil paints;
- gold leaf;
- sandpaper;
- golden paste;
- nacre;
- polish;
- squirrel brush No. 2-6;
- synthetic brushes No. 00-3;
- oil for painting;
- oil paint;
- oil varnish;
- set of cutters;
- Sinteko varnish;
- turpentine;
- car polish;
- flat synthetic brush No. 20;
- turpentine sanding paper;
- technical capacity;
- tee.

Now you need to sand the body of the product to remove the coating. When a matte surface appears, then finish this stage of work.

Use fine-grit sandpaper to avoid scratching the surface of the product. You can download the picture provided or use another one. Transfer the appearance of the Snow Maiden onto tracing paper.

Now place it on the lid of the box and mark the places that you will decorate with pearlescent paper. Then cut pieces of it into the required size and place them on the surface of the product to make sure that these inserts will be exactly in place of the pom-poms of the Snow Maiden’s hat and gloves.

Holding each such mother-of-pearl insert with your fingers in turn, you need to circle them with a cutter so that it leaves scratches here. Now you need to cut through the surface of the product according to these marks and insert an insert made of this thin shiny material into the recess. But first you need to coat this place with Poxipol glue.

After 15 minutes it will dry, then you will remove excess glue with sandpaper. Then go over the surface of the product with Sinteko varnish. Here's how to decorate the box further.
Wait until the first coat of this varnish dries, then apply the second one. In the same way, waiting until the previous layer dries, cover the box with four layers of this varnish. When the top layer has hardened, go over the surface with fine sandpaper.

To further decorate the box, apply PF-283 varnish to it. You need it to dry, but not completely. Then apply silver with a brush.

This is what the box looks like at this stage. Now attach tracing paper to its lid and trace the details of the image with a pencil so that they are clearly imprinted on the surface of the product.
Make the background by mixing oil paint with gold and silver paste. Using a thin brush, draw in the details of the image. Paint over the fur, facial features of the Snow Maiden, and the squirrel with oil paints.

Using paints of the desired shade, highlight other elements of the image, and also show where there is more light and where shadow falls.

Now the lid should dry for several days in a warm place. When this happens, apply 4 layers of Sinteko varnish in succession. After the top has dried, go over the image with fine sandpaper.
Cover the surface of the box with so-called imitation. It consists of several materials. First, squeeze oil paint onto the lid, then drop in varnish and a little thinner, called tee. Place this mass in a bowl of water and make a design on its surface with the handle of a brush. You need to lower the box into it.
This way you will cover the painted part with imitation. Where it is not needed, you need to wipe off the excess with a cotton swab.

Now put the box back in a warm place so that this coating dries completely. After that, you will paint it with varnish, when several layers of it have dried, then apply golden leaf to some of the details of the work. First mix the varnish with turpentine and apply this mixture to the places where you will glue the gold leaf. Which is what you will do.

When the varnish is completely dry, remove excess sweat with cotton wool, apply varnish on top and dry the product. All that remains is to highlight some places in the painting, paint the areas where you glued the gold leaf, dry the work and coat it with varnish. When all its layers are completely dry, all you have to do is polish the surface of the box with a soft cloth and admire what a wonderful work of art you have created.

If the method of decorating a box using this method still seems complicated to you, then check out another one. But if you don’t have such an item, then you can make it yourself, using very affordable material.
How to make a cardboard box?
You can create such a beautiful product if you take:
- bookbinding cardboard;
- textile;
- thin padding polyester;
- cotton lace;
- piece of paper;
- quick-drying glue, for example, Moment Crystal;
- cotton lace;
- pencil;
- ruler.
Press the pieces to be glued well so that they stick securely to each other. Therefore, you need to use quick-drying glue.
If you want to make a cardboard box of the same size, then use the following markings for the craft paper with which you will decorate this box.
Apply an iron ruler to the paper and cut off unnecessary fragments using a stationery knife. Based on the presented pattern, bend some of the blanks.

Here's how to make a cardboard box next. Steam the fabric with an iron until the surface is perfectly smooth. Cut 2 pieces from the canvas. The first will measure 33 by 23 cm. The second will measure 7 by 56 cm.

Glue the padding polyester to the outside of the sides of the cardboard box, use just a little glue so as not to crush the material, or double-sided tape. Now glue the fabric sides to these places.

Fold the fabric to the bottom and glue it here.
And cut the corners on top, not reaching the cardboard by about 2 mm, and bend the sides, gluing them to the sides.
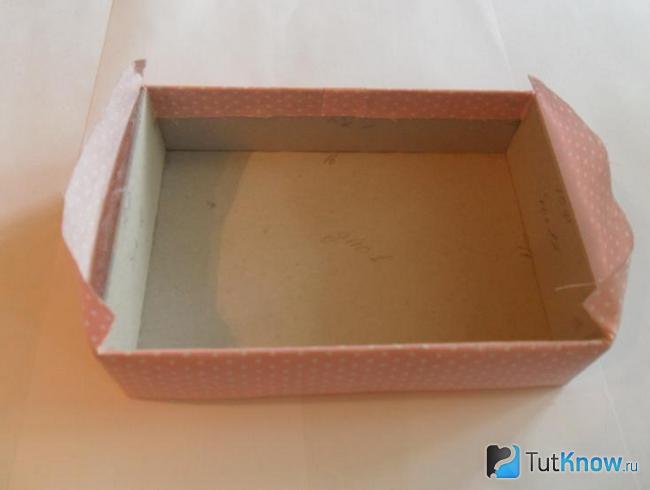
Glue paper inside the cardboard box. This is how beautiful the workpiece looks at this stage.
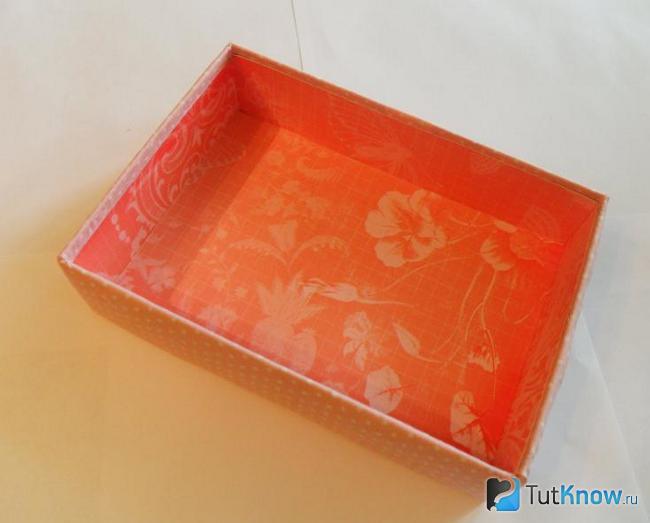
You need to make the top part of the box. To do this, glue the padding polyester onto large cardboard rectangles, which are located on the left and right in the next photo.

As you can see, there is a distance between these three cardboard elements. It is equal to 7 mm. Now fold the fabric onto the paper base and glue the corners first, then the sides.

Here's how to make a cardboard box next. You can sew the same tag to the bottom of the product.

Attach the lace trim by sewing it down. You can also attach a metal tag.

Take a piece of scrap paper and place it on the back of the lid so that the same small fabric frame is formed on all sides. Run your fingers or a scissor handle along the folds.

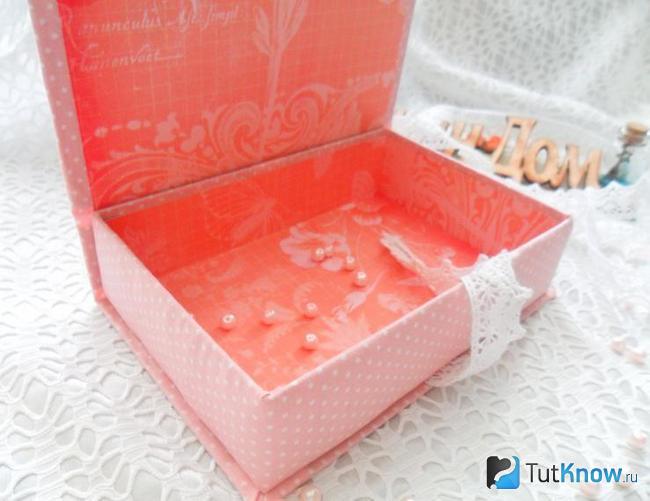
Apply a lot of glue to the second part of the cardboard and glue it to the box.

When it dries, you can put jewelry or other small items inside the box. A very nice box made of cardboard, which is made by hand.
If you have a great desire to have such a thing, but not enough materials, then see if you have a wooden bracelet, a cardboard reel of tape, a milk carton, an eggshell, a box at home. After all, from each such item you can make a wonderful box.
This is what you will learn now.
How to make a box - master class
If you like the shabby chic style, then by all means make a box of this type.
Shabby chic style

For the base of the box you will need a cardboard box from Raffaello chocolates, but you can take another one, including a metal one.
Here's what you'll need to make the box:
- Raffaello chocolate box;
- textile;
- lace;
- a piece of paper with a picture;
- beaded ribbon;
- glue;
- paper;
- threads;
- Styrofoam;
- thick thread;
- various decorative elements.

According to the size of the bottom of the box, cut the same circle from paper, as well as from foam plastic. Coat the sides of the container with glue and attach a piece of paper with a pattern here. Place the foam piece on the fabric and cut out a circle of larger diameter from it.

Place a cardboard circle on the foam blank. Gather the edges of the fabric with a thread and bring them to the top of the paper blank.

Drag the edges of the fabric with threads to secure the part in this position.

Connect the lid to the box and decorate the outer walls with lace, beaded ribbons and other decorative elements. Secure the braid with thick thread.

If you have wooden bracelets, you can make a box out of them.
Wooden box
You will need:
- wooden bracelets;
- multi-colored polymer clay;
- glue gun;
- round cookie cutter;
- white marker;
- tassels;
- paints.

Roll out a sheet of polymer clay into a circle with a rolling pin, place a wooden bracelet on it and trim off the excess along the contour of this product.

Bake the polymer clay to create a bottom for the box. Now you need to paint the bracelet yellow or another color and draw various lines or other patterns with a marker.

Insert the baked bottom down the bracelet and secure with a glue gun.

Now take a couple of cookie cutters, the diameter of the first should be the same as the diameter of the bracelet itself, and the second a little smaller. Using them, squeeze out two circles of green polymer clay and bake them.

Also bake a leaf cut from this material. Then it needs to be glued to the top. This is such a wonderful lid and the box itself will turn out.

If you like it, but don’t have polymer clay or bracelets, then make the same round one from tape reels.
From the sleeve
Take:
- tape sleeves;
- liquid plastic;
- polymer clay;
- satin ribbon;
- cardboard;
- glue;
- talc;
- texture sheets for clay;
- varnish intended for working with plastic;
- scissors;
- brush;
- video clip.

Now glue these circles to make a box with a bottom and a lid.

Roll out the clay thinly and cut a rectangular piece from it, which needs to be cut with a knife on both sides.

Lubricate the sides of the sleeve with gel intended for gluing polymer clay products. Attach this segment here. Use a thin knife to remove excess.

Decorate the entire inner wall in this way. Now cut a circle of polymer clay to the size of the bobbin diameter and glue it as the bottom.

If you used dark polymer clay, then make a flagellum from light one or vice versa. Glue it at the junction of the inner wall and the bottom of the box.

Decorate the other half of the box in the same way and bake these two blanks in the oven so that the polymer clay hardens.

While this is happening, you will take the texture sheet and sprinkle it with talcum powder. Now you can roll out this material with a roller and cut it into squares. You will use them to line the outer wall of the box, attaching these elements to the gel. But first you need to glue these two reels together to make the container higher.

Do not cover one strip yet, you will put a satin ribbon here, then smear it with gel on top and glue the rest of the squares here.

Cut a circle out of clay, cover the lower part of the product with it, and then all that remains is to bake the box again. This way you have decorated the bottom of this container. To complete the top, decorate this part also with squares glued to the gel.

Do not fill one row of the box yet, but first attach a satin ribbon here, and then cover it with squares.

Glue plastic triangles to the lid, and then attach the other half of the satin ribbon to the side.

Fold a small piece of satin ribbon in half and glue it to the side of the box.

Cover with white acrylic, when it dries, you can open and close such a lovely box.

Ribbons will allow you to hold the two parts and fold the lid with ease.
The next box is made from waste material. Dairy packaging is usually thrown away, but if people saw what kind of box they could make from cardboard, many would want to have one.
From a milk carton

To get such a beautiful thing, you need the following set of items. It consists of:
- packaging for dairy products;
- double-sided tape;
- a piece of canvas;
- ribbons;
- scissors;
- knife;
- rulers.

Using double-sided tape, you need to glue these elements together, and then attach the fabric to the future box.

Cut a rectangle from the side, it will become the lid. Also, applying tape here, cover this part with fabric. Glue the ribbon. You can still tie a beautiful container.

All you have to do is, using double-sided tape, glue the lid and the bottom of the box together and a wonderful box, made with your own hands, will appear before your eyes.

You can make many useful things from eggshells, including decorative elements for a box. Other materials are also very affordable.
From eggshell
Take:
- eggshells;
- napkins;
- manicure sticks;
- paints;
- PVA glue;
- a thread;
Decoupage the box will help you further decorate it. Take the top part of the napkin and glue it to a surface greased with PVA glue. After it is completely dry, you will see such a beautiful box for jewelry or small items.

If you were interested in learning how to make a box in this way, then you can watch how others make them.
If desired, even ice cream sticks can be turned into such a designer item.
It’s quite easy to make a box from an ordinary shoe box.
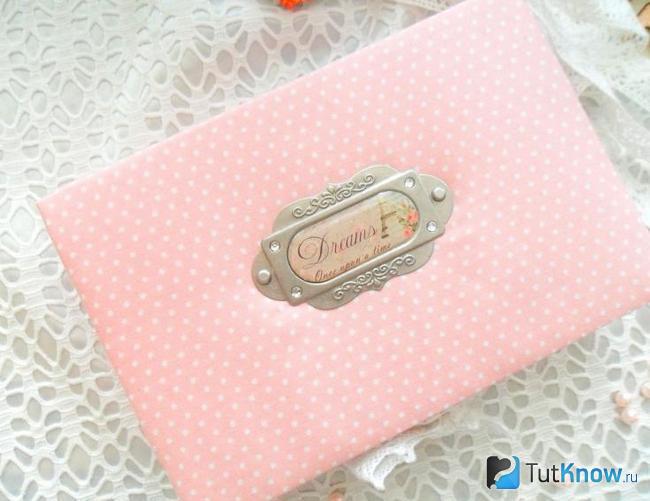
According to the author. I want to tell you how to make a jewelry box using the cardboard technique. I love this technique because it allows you to make a beautiful and practical thing from simple and affordable materials. You can come up with any shape, any number of departments and drawers - and you can make all this from a sheet of cardboard and a piece of fabric.
For the master class, I chose a relatively simple form of jewelry box. It has one department for small bracelets, chains, pendants, etc. and a department for rings and earrings. It can be a very successful gift and will not require large financial investments from you. Or maybe you want to make one for yourself to store your treasures :)
In this master class you will learn basic cardboard techniques, get acquainted with one of the types of hinges and a method for making a puffy cover on such a hinge. The latter can also be useful for those who make notebooks.
There will be a lot of text and pictures too. I tried to describe for you not only the sequence of actions, but also explain why I propose to do it this way. So that you know in advance about some possible mistakes and ways to avoid them.
Ready? Then let's get started :)
We will need:
Materials:
- Binding cardboard (2mm thick will be enough).
- PVA glue. (You need something thick and not yellowing over time. For example, PVA Furniture from the Lakra company. A more expensive option is PVA from Henkel. You will find both of them in construction stores. If you are not sure that you need 1 kg of glue and If you want to try just one box, then PVA from the company "Luch" will do. From the types of PVA that I have seen in office supply stores, I believe only this one).
- Masking tape (about 4cm wide) or thin kraft paper to reinforce the ribs.
- Glue "Moment-crystal".
- Ordinary Whatman paper.
- Textile. (100% cotton is best. It will be easier with it. It sticks well and does not stretch. At least a couple of companion fabrics. The main thing is without synthetics).
- Tapes - 2 pieces, 15 cm each (these will be stoppers for the lid).
- Optional - padding polyester and decorations for the lid.
Tools:
- A wide knife with segmented blades (I like the construction knife better. The stationery knife has a thin blade and cuts cardboard worse).
- Scissors.
- Self-healing cutting mat. Or an unnecessary piece of linoleum.
- Ruler. (At least one iron ruler with precise markings. I have three of them: a meter ruler for drawing long lines across the entire sheet of cardboard, a short one with precise markings, and a large transparent rectangular ruler.)
- Synthetic glue brush. She should have neat stubble. Otherwise, take the cheapest one.
- Pencil, sharpener, eraser.
- Stack to smooth all surfaces and corners.
- A cloth to immediately wipe off the glue on the work surface.
- A jar with low sides to pour some glue from a large jar into.
- Not necessarily a roller knife. Some cardboard makers like to use it to cut cardboard. I love cutting fabric with it. Convenient, but you can do without it, it’s not cheap.
Assembling the base
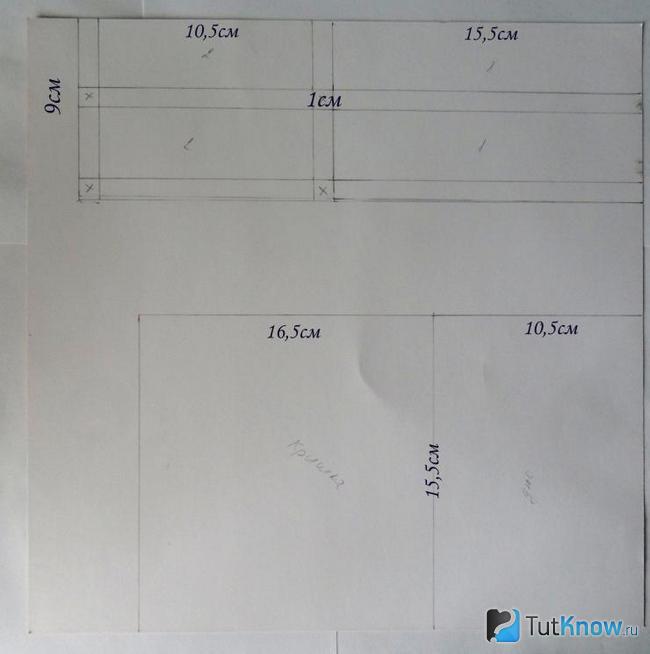
Where does any cardboard box start? From the drawing! Cartoning requires precision. Therefore, as soon as you have an idea for a future box, take paper and write down the exact dimensions of the parts. There are no particular difficulties here. You just need to always take into account the thickness of the cardboard. In our case 2 mm. As an example, I will give the exact dimensions of my box:

When laying out, try to place pieces of the same width side by side. This makes it easier to cut them into equal parts.
When slicing, keep the tip of the knife perpendicular to the cardboard (no chamfers needed here). The knife itself is angled in a position that is comfortable for the hand. And cut vertically from the far edge towards yourself. Smooth perpendicular cuts should be obtained. These are the ones that will give us a strong connection without distorting the shape of the box.
Please note that the factory edge of the binding board is not smooth. There are two options - cut off this edge or sand the cut parts. This can be done with a file or sandpaper. The main thing is to get parts of a given size with smooth edges at the output.
We cut out all the parts from the binding cardboard and proceed to assembling the box. For this step we will need masking tape (or craft paper), a moment crystal and a stack.

We glue the walls from above to the bottom, not from the sides. Apply glue to the long wall part, on the bottom of the cardboard cut, like toothpaste. Generous enough. It’s easy to remove the excess later, but if there is not enough glue, the box will be shaky.

Place the part and align it. By the way, here we see one of the advantages of our glue - it does not dry out instantly and allows you to move the part and put it exactly in place. When you have aligned the part, press it on top with both hands - this way the glue will better adhere to the parts. Remove excess glue. I just remove it with my finger. If you are worried about your manicure (the glue does dry out), then try removing this excess with something metallic.
After the long wall we glue two short ones. Here we apply glue to both sides to glue the joints with the bottom and the long wall.
Align, press. You should get a neat corner without steps. All joints must be smooth, one part smoothly transitions into another. Because these small “thresholds” will be noticeable even after gluing the box, and the appearance will not be very neat.

Next we need to glue a partition between the two sections. In order to glue it evenly, I first marked its location on the walls of the box (see photo above). Apply glue to the cuts on three sides and insert the partition into place.
Now put the glue aside and paint all the upper sections of the parts with white acrylic paint. This is necessary so that the color of the fabric on the sides is not distorted and it does not look dirty. Avoid paint runs!

While the paint dries, we will strengthen all the ribs. You can use strips of craft paper and glue them onto PVA, or you can use masking tape. I like the second option.
Let's start outside. Cut a piece of tape slightly shorter than the side of the box. It is not necessary to glue from corner to corner; I find it convenient to take the pieces a little shorter. Since the walls will become completely motionless and the corners will subsequently be covered on both sides with fabric, I am not worried about them. So, apply a piece of tape and smooth it out with a stack. It is important. In order for the tape to really hold the cardboard well, it must be smoothed and pressed properly.
To move along the edge to the other side, I press the tape at an angle with two thumbs exactly on the edge. And gradually I seem to “roll” with my fingertips to the other side. And I smooth it out with a stack. There is only one thumb in the photo, because the second one is occupied by the camera :)

In general, the cardboard stack should become your mantra and second hand :) Ultimately, you should not have a single centimeter left unironed.
We go through all the external edges in this way: both vertical and horizontal.

It's a little more difficult to paste on the inside and not so convenient. We pinch a piece of tape with two or three fingers and place it in place. At the same time, we apply it only to one side for now. You don’t need to glue it to the second one right away.

We hold the free side with the finger of one hand, using the other hand we stroke the tape from the glued edge towards the corner and gradually move it towards the corner. We carefully move the same stack along the depression and thus paste the tape into the corner, while simultaneously moving the other hand away from there so that it does not interfere.

In this way we strengthen all the joints from the inside.

Now let's prepare the platform for the rings. It should not be as deep as the main compartment, because then it will be inconvenient to use. At this place, if desired, you can make a remote drawer, but let’s not complicate the design now. In order to raise the floor, we glue “supports” to the long walls of the small compartment. And we’ll glue a pad on top of them.

Ta-dam! We have finished the cardboard base of our box :) I like the next stage more, because with each piece of fabric glued the box is transformed.
Pasting with fabric
What is useful to remember when working with fabric?
- The fabric completely covers the cardboard. There should be no gaps anywhere in the finished box.
- Wherever possible, we avoid open cuts. I will show how they can be made so that they do not crumble, but this can only be used on stationary elements. In all other cases, we fold the fabric. It is advisable to minimize the thickness of the folds.
- Apply the glue in a thin, even layer so that it does not bleed through the fabric to the front side. If this happens, blot the affected area with a damp cloth. Several times until you remove all the excess. It is not possible to completely remove glue from every fabric, so it is better to avoid such mistakes.
Let's start with the back side. Since it will be glued to the spine, it is not necessary to completely cover it with fabric; we will make do with a narrow strip of fabric. Cut out a piece of fabric equal to the long side of the box and 4 cm wide. I missed a couple of photos here, but I'm sure you can imagine a rectangle of fabric. First glue it to the back side of the wall and cut it as shown in the photo. At both ends and above the partition.

We coat the edge and the strip on the inside of the wall with glue. We bend the fabric in the same way as we glued the tape, stretching it over a cut of cardboard and carefully ironing it with a stack.
Now we cut out a rectangle from white Whatman paper with a length equal to two short walls and one long one. The height of the paper part is equal to the height of the walls along with the thickness of the bottom. For us it is 6.2 cm.
Apply glue to the paper part in a thin, even layer. If you cannot evenly distribute the layer of glue with a brush, use a roller. But I like working with a brush.
Glue the paper piece to the wrong side of the fabric. There are two interesting points here:
1. I don't cut the fabric in advance. Instead, I first glue the paper piece to a solid piece of fabric, and only then cut out the desired piece. Why? This makes it convenient for me to measure allowances, and it is also convenient to align the paper part with respect to the pattern or threads in the weave of the fabric.
2. If the part is long, do not try to cover it all with glue at once. Do this in sections. Covered, for example, 15 cm in length, glued to the fabric. We folded back the dry part, covered another 15 cm with glue, glued it to the fabric, etc. Because good thick PVA dries quickly enough and it is unlikely that it will be possible to do this all at once over the entire length, say, 40 cm.
We begin to glue our part to the front long wall. Yes, we start from the middle :) This makes it easier to avoid skewing the part. If you've ever tried to stick a long piece of tape to something, you'll know what I'm talking about.

Before we glue the seam allowances to the back wall, we'll make cuts like these on them and form the corners.

Our blank is now glued on the outside, but the seam allowances stick out up and down. Let's do something about this.
We bend the seam allowance sticking up on the long wall and glue it. He does not participate in the formation of corners. To make corners on short walls, you need to successfully fold the fold. We have already formed the corner near the back wall (see photo above), we just need to glue it. We will first form the second fold “dry” without glue. To feel how the fabric will lie. We are not cutting anything here. Please note that the entire fold should lie on the short wall and fit neatly into the corner, without creeping onto the long wall

From behind, after these manipulations, the workpiece looks like this:

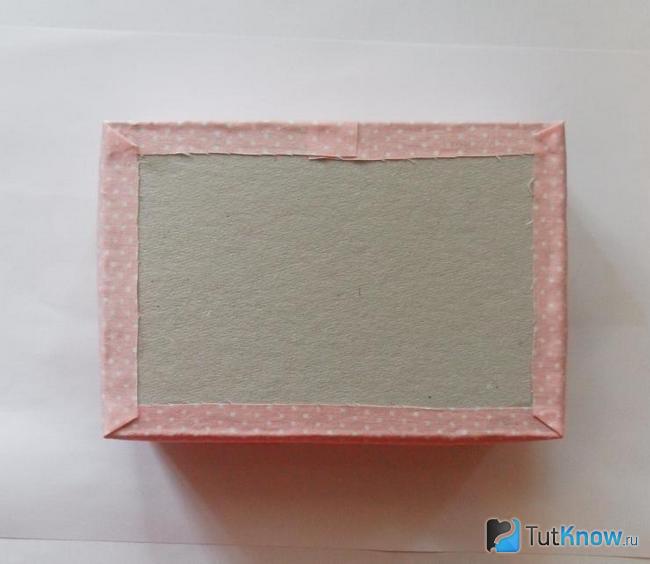
Now you need to glue the allowances on the bottom. There are two options: to do this without trimming the fabric and with trimming. I choose the second one. Why? Because without trimming we will get folds in three layers of fabric. And these three layers will then be like the “legs” of a 1mm thick box. This millimeter will not allow the box to be glued to the bottom tightly enough over the entire area.
So let's cut :) You need to trim so that there is 2-3 mm left for a tiny fold. Further, the slices should not overlap each other. We will need a small fold so that the outside corners will look neat later. And the miniature size of the folds and their small thickness will give us the opportunity to press them into cardboard.

After gluing, we get flat corners.

Now you need to cover the bottom inside the box. To do this, cut out two parts from paper, the sizes matching the sizes of the bottoms in two sections of the box. Glue these parts onto the fabric, cut them out with 1.5 cm allowances. Cut the fabric diagonally, leaving 1.5-2 mm to the corners of the paper. You don’t need any more, because then you won’t be able to fit this allowance neatly into the corner of the box.

First, coat the bottom with glue and place our part there. Then we glue the allowances and corners. We smooth everything out with a stack.

To cover the cut of cardboard, we cut out a rectangle of fabric near the partition, just as we cut out a fragment for the back wall. But with one significant difference. Remember, above I wrote that I would show the moment when we have an open cut? It is he. And our task is to play with this cut so that it is as unnoticeable as possible. To do this, we need the fabric to not fray. This is not difficult to ensure - before cutting the fabric, coat the areas of future cuts with glue. But be very careful so that the glue does not bleed onto your face.

Here's what we have at the moment:

At this interesting point, we will put aside our preparation and move on to the cover. This is because of the stopper tapes. In principle, you can make the cover first and then, without interruption, the box. But I like this order.
Cover
Our cover consists of three parts: the bottom, the cover and the spine. The lid will have a layer of synthetic padding. The bottom and spine are like the rest of the parts with a layer of white paper. By the way, this is the only moment in the box where I first glue the paper to the cardboard, and only then the fabric. As for the cover, I lightly coat it with glue and apply it to the padding polyester. Glue is needed to prevent the padding polyester from fidgeting. I trim off the excess with a roller knife.

I want to decorate the lid with a pendant. To do this, you need to make a small slot in the lid. Along the long side we mark the middle. On the short side - 1cm from the edge. We make a small slot, insert a ribbon there and glue the tails to the cover. Of course, it’s more convenient to do it before gluing the padding polyester, but this thought came to me while I was walking. Why through a slot? It's more reliable. The habit of tying on notebooks, I do the same there. We will make sure that the slot for the ribbon is located flush against the edge of the endpaper. The cut will not be visible, and you can even lift the box by the pendant, but nothing will be done to it.

For the cover, cut out the fabric with 2 cm allowances on each side.

Place all three parts on the fabric, leaving a distance of 3-4 mm between them. We immediately glue the flat parts, the part with padding polyester is temporarily attached to the spine with pieces of masking tape so that it does not fidget. And glue the allowances along the long edge.

We make a cut for the pendant, try it on, but don’t glue it yet. Let's glue it after we form the corners.

How to make corners with minimal thickening? At the moment this is how I do it. I trim the fabric along the cardboard, not reaching the corner 2 mm. From this point I cut perpendicular to the cardboard. Next, I fold the fabric so that its cut is parallel to the cardboard and lags behind it by 2 mm, which is equal to the thickness of the cardboard. In this case, we have a small fold. Let's cut it off. We get a broken line, which first continues the line of the cardboard, then goes at an angle of 45 degrees. When you fold this structure onto the cardboard, you will see how neatly it fits there.

After we have formed all four corners, glue the allowances on the short sides.

Now is the time to glue the stopper tapes. Thanks to them, the hinge will last much longer. And it’s more convenient to use a lid with stoppers.
We cut two ribbons 14 cm long and glue them symmetrically at an angle to the cover. They should be free at a distance of 1 cm from the edge. The rest is glued.

Now let's make the endpaper. To do this, cut out a piece from paper that is 2 cm shorter in length than the cover and 1 cm narrower in width. On three sides the allowance is 1.5 cm, on the fourth - 3 cm. This long allowance will then be hidden between the spine and the back wall.

We form the corners on the paper parts as follows: from the long side we cut off the excess fabric flush with the edge of the paper part. On the short side we make a broken line, as in the photo below. We glue the long side first, then the short one. The photo below is from another detail, simply because the frame here is better.
Every woman at least once in her life is faced with a situation when there is nowhere to store her favorite small trinkets. Someone solves the problem by inspecting the house. But you can get by with “little expense” without depriving yourself of your accumulated wealth - make a cardboard box with your own hands.
What size your chest will be depends primarily on the volume of accumulated treasures - some will need an original small paper box for earring rings, while others will have a container of materials for needlework that will reach the size of a grandmother’s chest. In any case, whether you want to make a beautiful chest for your mother or make something convenient for yourself - take a look at our tutorials, you will be able to understand step by step the stages of creation and then you will be able to make a box of any size.
 Cardboard crafts – original hobby with a distant history. In the modern world, few people master this art, however, twenty years ago it was the most popular way to have fun on a boring, rainy evening. The boxes were made not only from new cardboard, but also from old postcards or magazines.
The most interesting thing is that despite the incredibly beautiful appearance of the finished product, the manufacturing process is very simple. To create a paper box, you don’t need any special skills or knowledge; just collect all the necessary materials and you can get started.
Preparatory stage
 On the Internet you can find many ready-made blanks for creating a cardboard box. They just need to be printed and assembled. But it’s much more interesting to create a blank on one's own. You'll have to use your imagination and a little ingenuity, but the result is worth it.
Before you start creating a workpiece, you need to decide on the method of fastening the parts:
- Gluing;
- Assembly;
 The set of basic materials.
However, techniques can be combined, using both gluing and assembly for one product.
The finished box can be further decorated applique or flowers made of satin ribbons. It all depends on your taste and the purpose of making the box.
Gallery: cardboard box (25 photos)


Box using gluing method
 So, let's get down to the main question of the article: how to make a cardboard box? Let's consider the simplest one option– glued cardboard box. The capacity and purpose of such a product depends on your needs.
We will need:
- Thick cardboard;
- Two tetrapacks of milk (one tall, the other medium-sized);
- Clothespins;
- PVA glue;
- Super glue;
- Scotch;
- Kraft paper;
- Scissors;
- Two small magnets;
- Wood beads;
- Materials for decorating the product: beads, ribbons, fabric, flowers, fringe, etc.
Let's start the master class:

 In such a product you can store various women's small items or materials for needlework. The original way to use it is to keep it in a box. watch. For fashionistas who have a large number of these wrist accessories in their wardrobe, such a box will be a real salvation. The watch mechanisms will be protected from dust and accessories will no longer get lost, always being in one place.
The assembly method is the simplest possible. To complete it, you need to find it on the Internet and print the finished template on thick paper. Then, using scissors or a utility knife, cut out the shape and assemble. After assembly, the product can be decorated with any decorative elements. This option for creating a box is ideal as gift wrapping.
Original money box
 Many people use various types of money to store money. secret places, which can be easily purchased at any souvenir shop. But why, if you can make a money box with your own hands? An original piggy bank will reliably hide your savings and decorate your interior.
To create a storage box money we will need:
- The book (it will serve as a hiding place);
- Stationery knife;
- PVA glue;
- Glue brush;
- Kraft paper;
- Pencil;
- Ruler.
Let's start the master class:

The product can be used as packaging for valuables gift, for example, luxury watches. By making several compartments in the box, it can be turned into storage for small items. Or make a shaped hole, then such a box is ideal for storage memorabilia.
Cardboard box
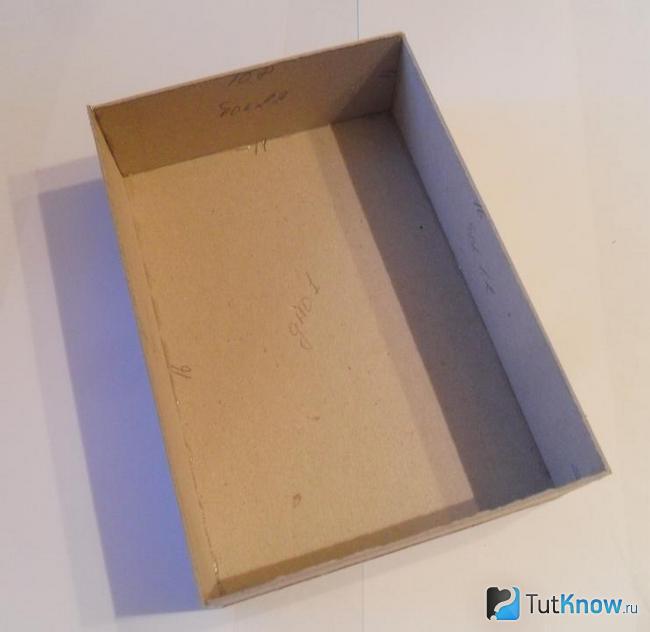
 Another simple way to create a cardboard box with your own hands is to use a ready-made box. For the master class we will need:
- A simple cardboard box;
- Magazine clippings;
- PVA glue;
- Pencil;
- Ruler;
- Thick cardboard;
- Lace or rope.
Let's get started:

 By the same principle you can do box with compartments or drawers. Only in this case should you braid the box after connecting all the parts. It's not difficult to do this kind of work. Print diagram box you like, cut out and assemble the parts.